


I think there are two groups of Halloween people – those who like the actual horror aspect of the holiday and will embark on scary-movie-marathons and voluntarily venture inside a haunted house and those who like the idea of super themed holiday but can only handle minimal Halloween motifs and will use any opportunity to turn scary Halloween characters into something cuter and more approachable. I am obviously in the latter.
Once I left the age bracket of what is socially acceptable to go trick or treating, I stopped celebrating Halloween. I do not love scary movies (the jump scares from Beetlejuice is the most I could handle) and there is no way I will voluntarily enter a haunted house attraction or a corn maze. The only way you can get me to do any Halloween-related activity is if Halloween-themed baking. I will never pass up any opportunity to make something look a bit cuter.
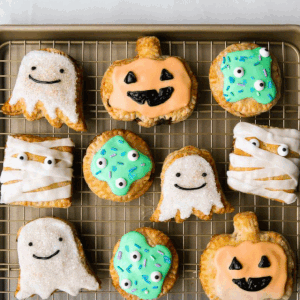
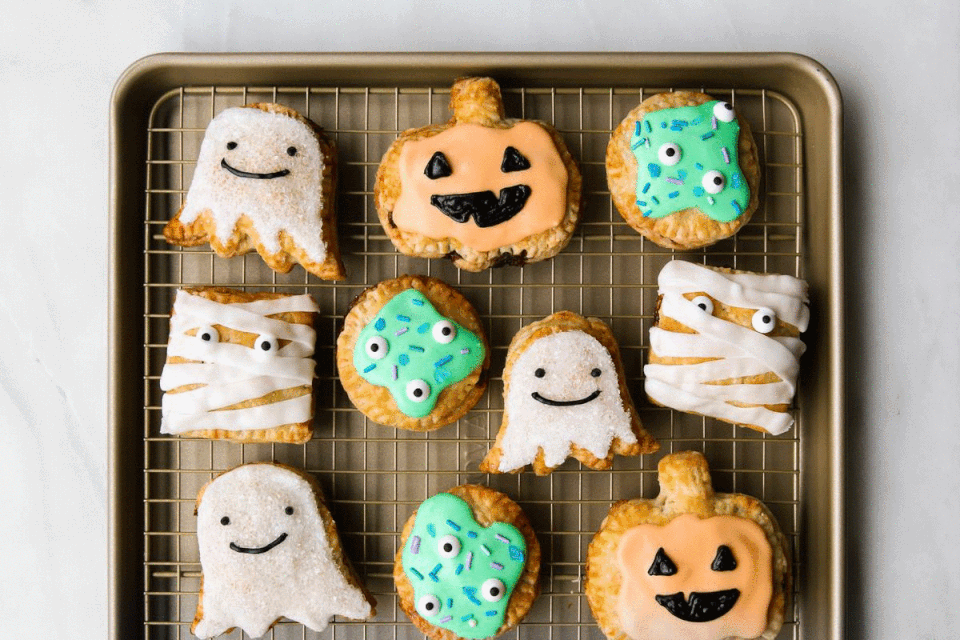
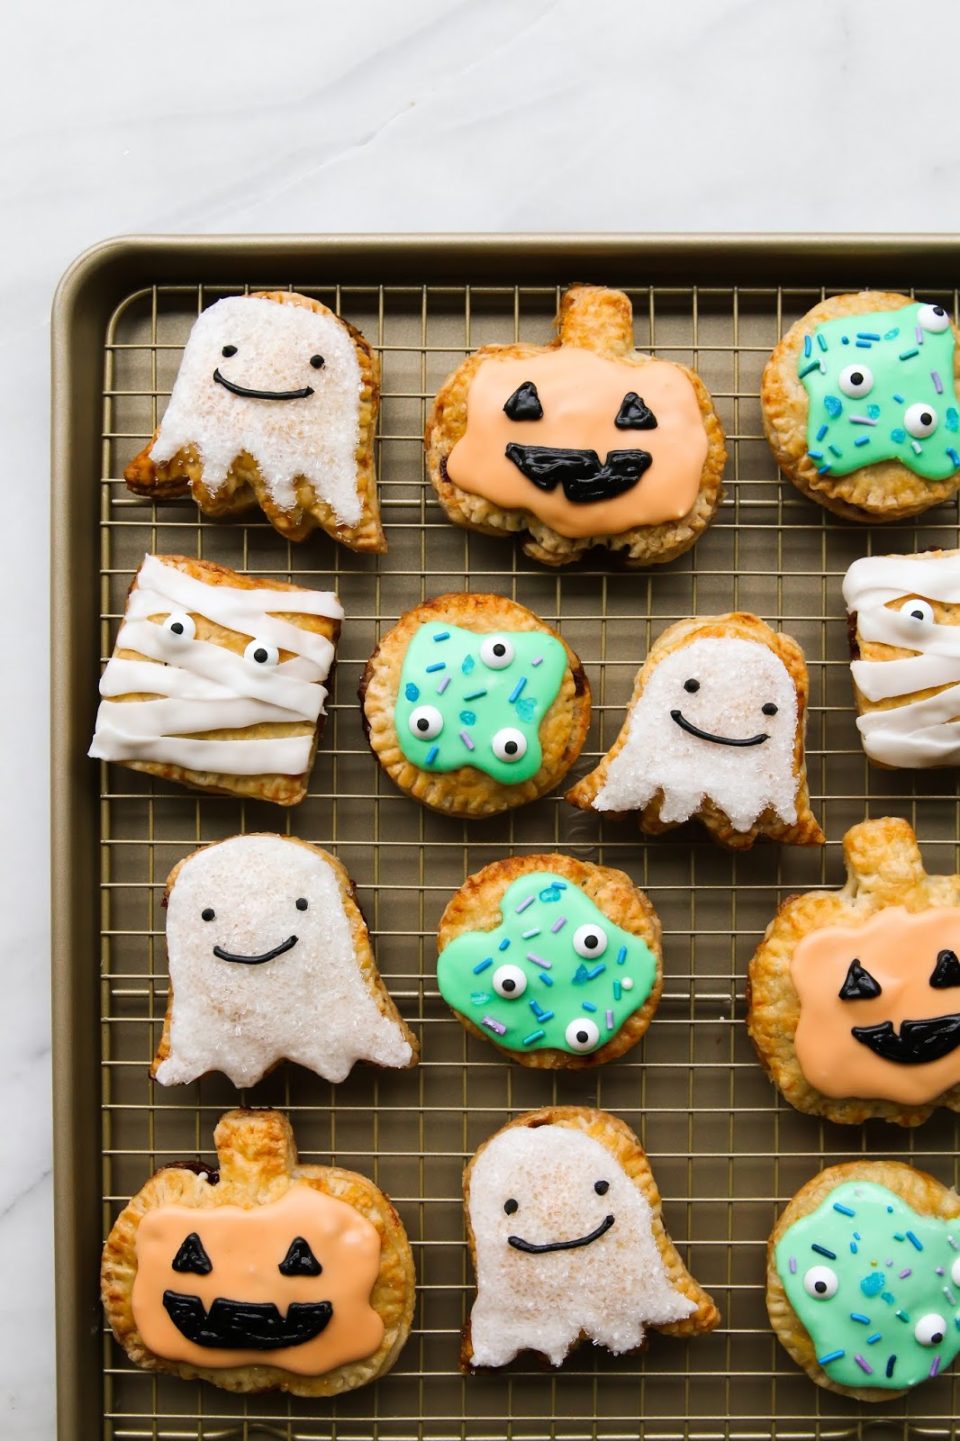
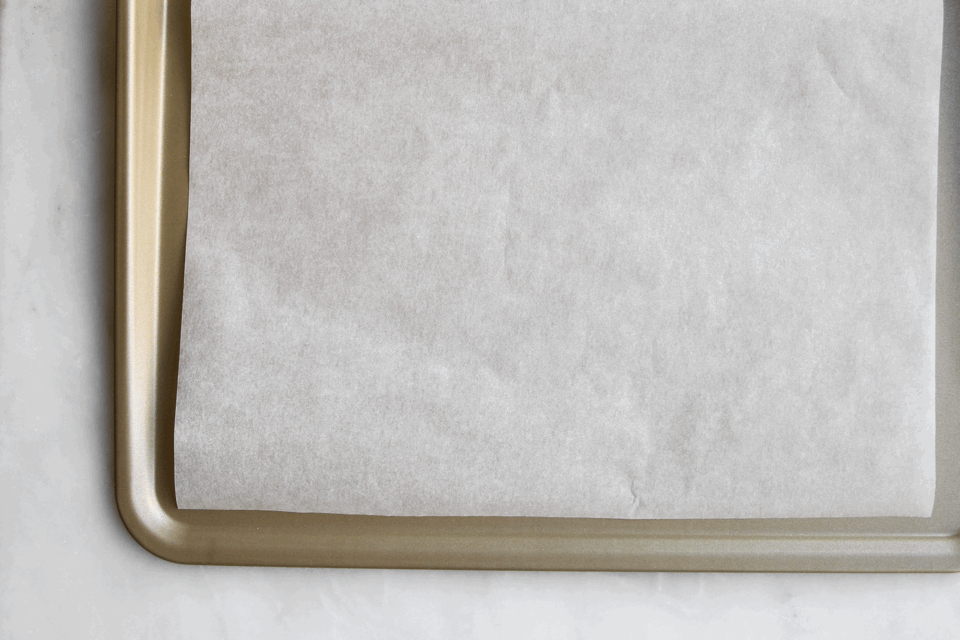
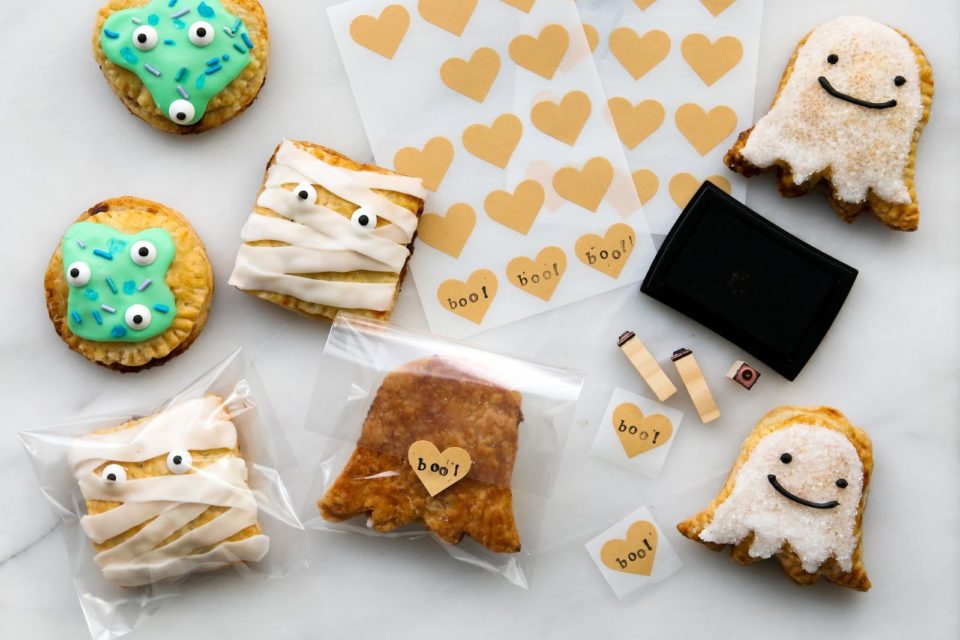
For Halloween this year, I am partnering with Williams Sonoma to make these spooky breakfast tarts with a simple brown sugar filling. I am sharing my favourite all-butter pie dough recipe for these breakfast tarts but you can always use store-bought pie dough in a pinch. I baked these breakfast tarts on the Goldtouch® Nonstick cookie sheet, which is truly -nonstick-. You can bake your little hand pies directly on the cookie sheet or you can line the baking sheet with a piece of parchment to make clean up even easier. Some of the brown sugar filling in the first batch escaped off the parchment and baked onto the cookie sheet but it came off easily with a wet paper towel.
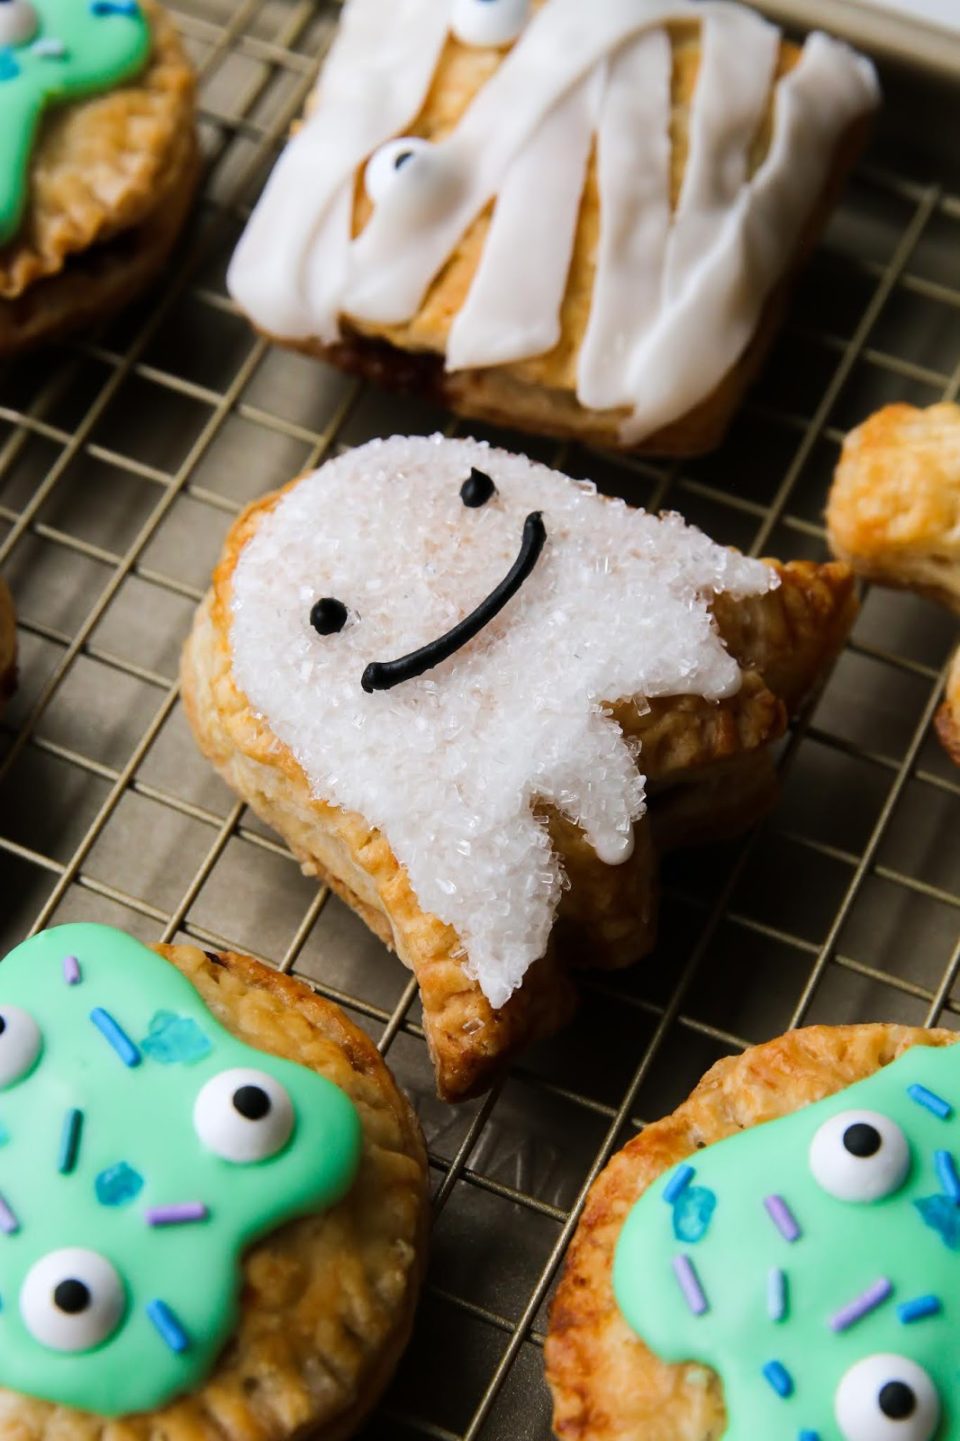
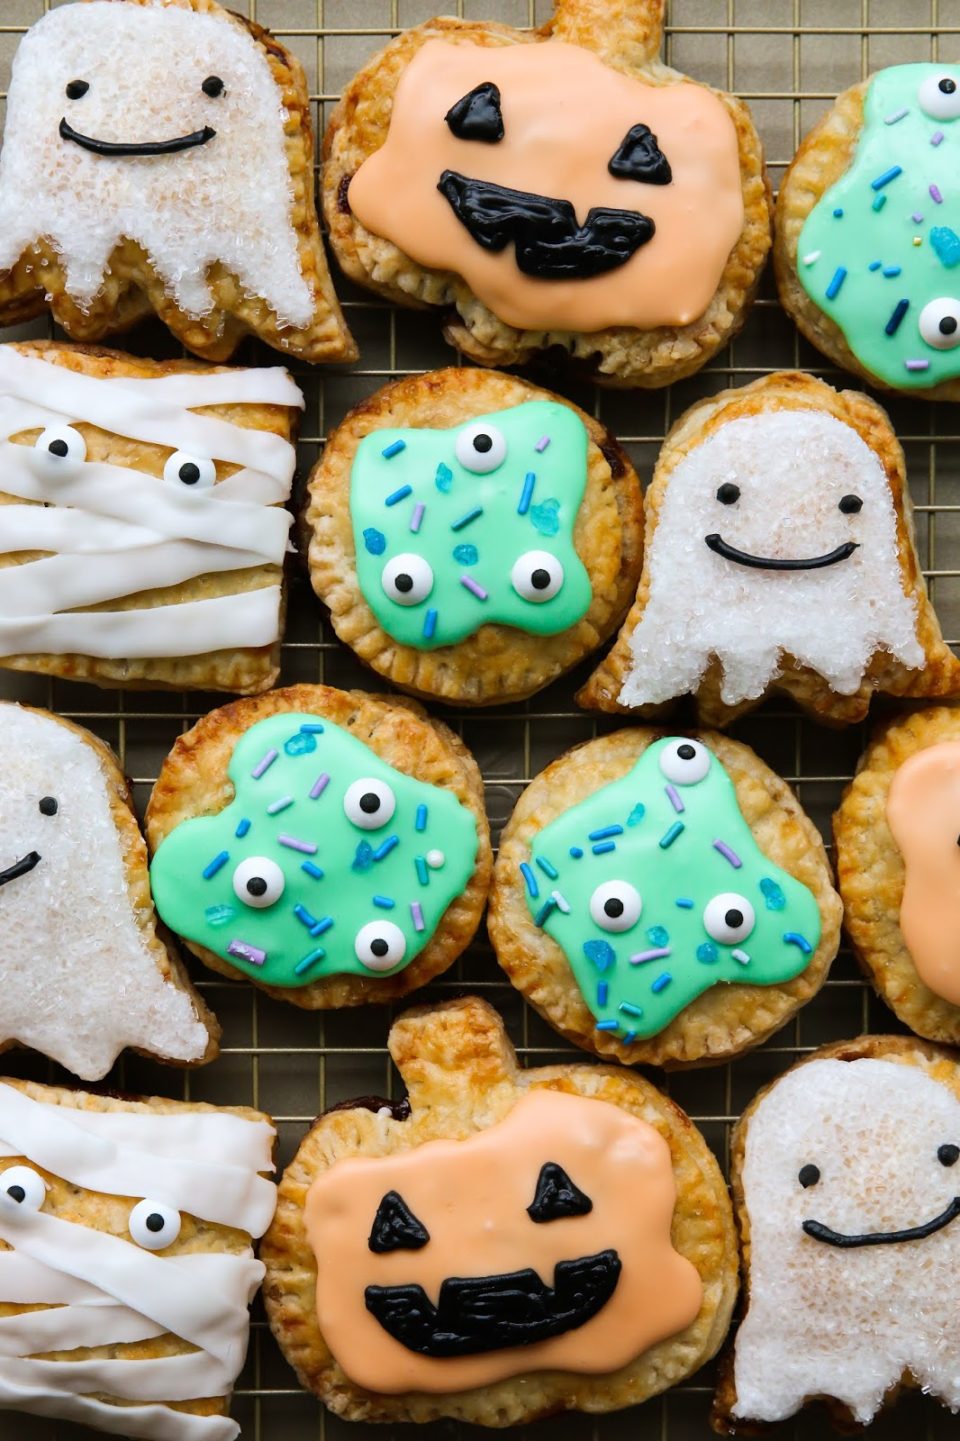
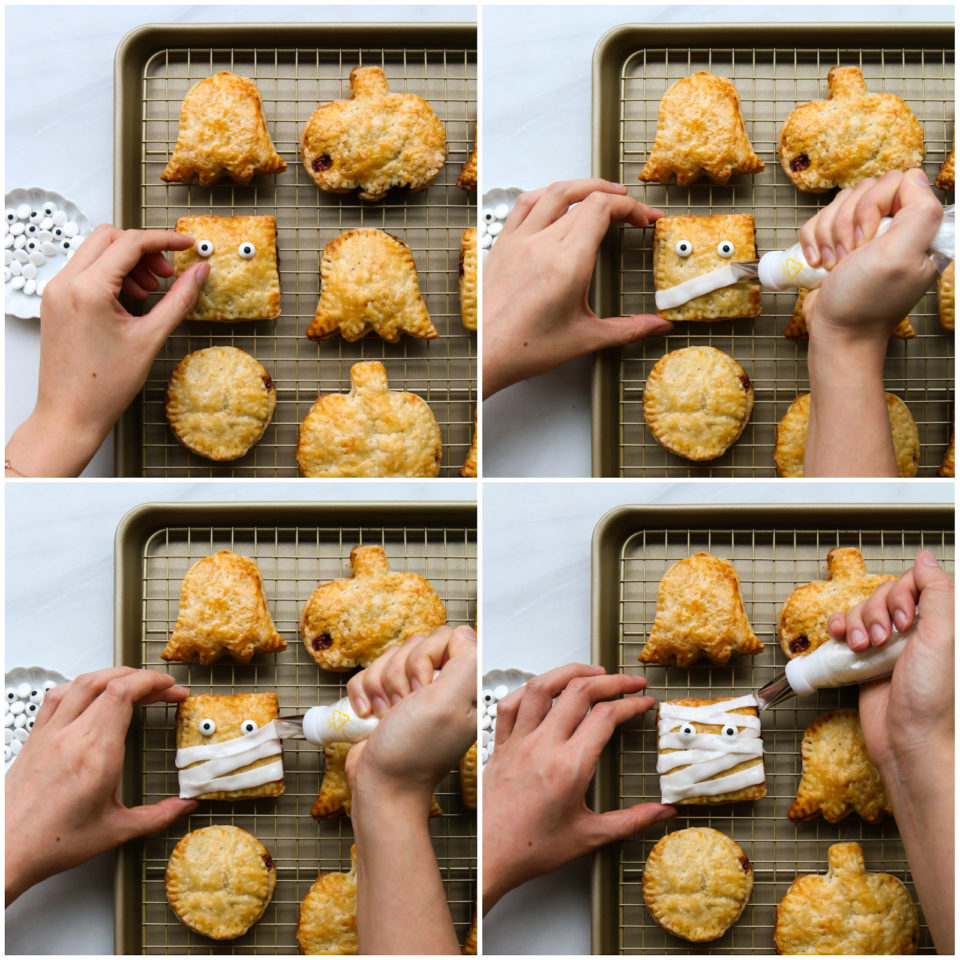
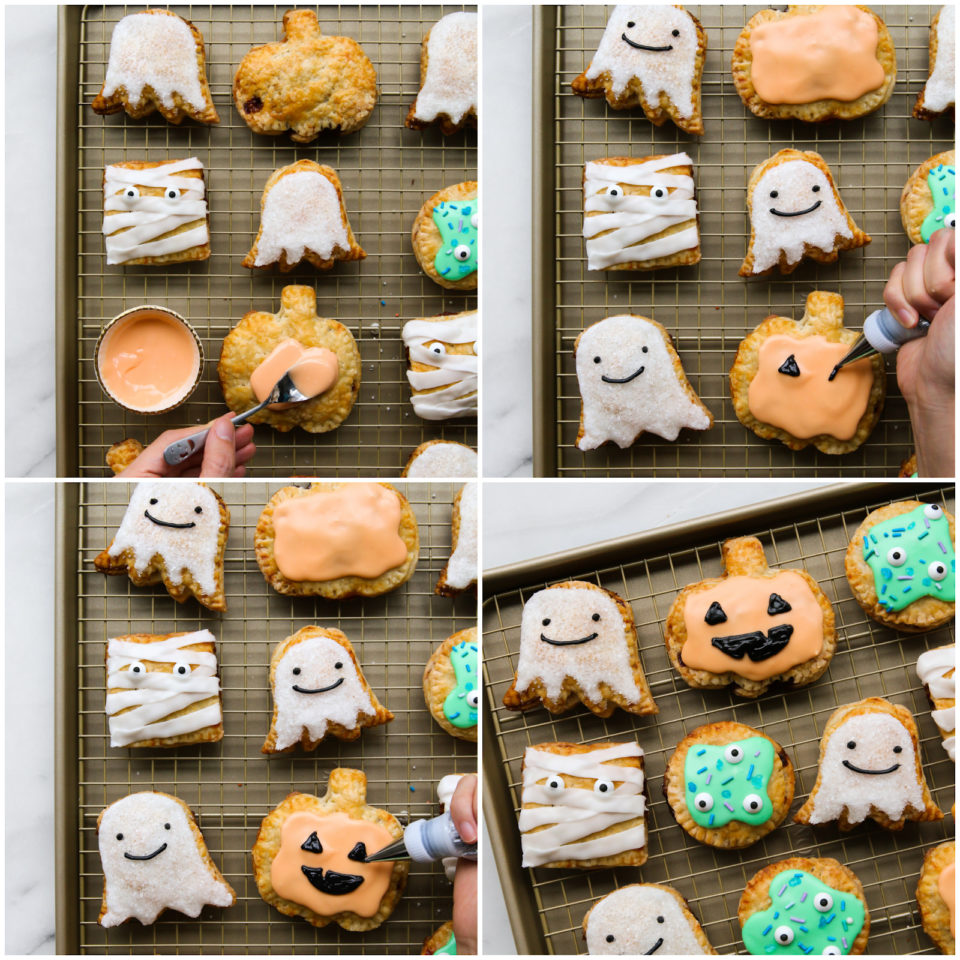
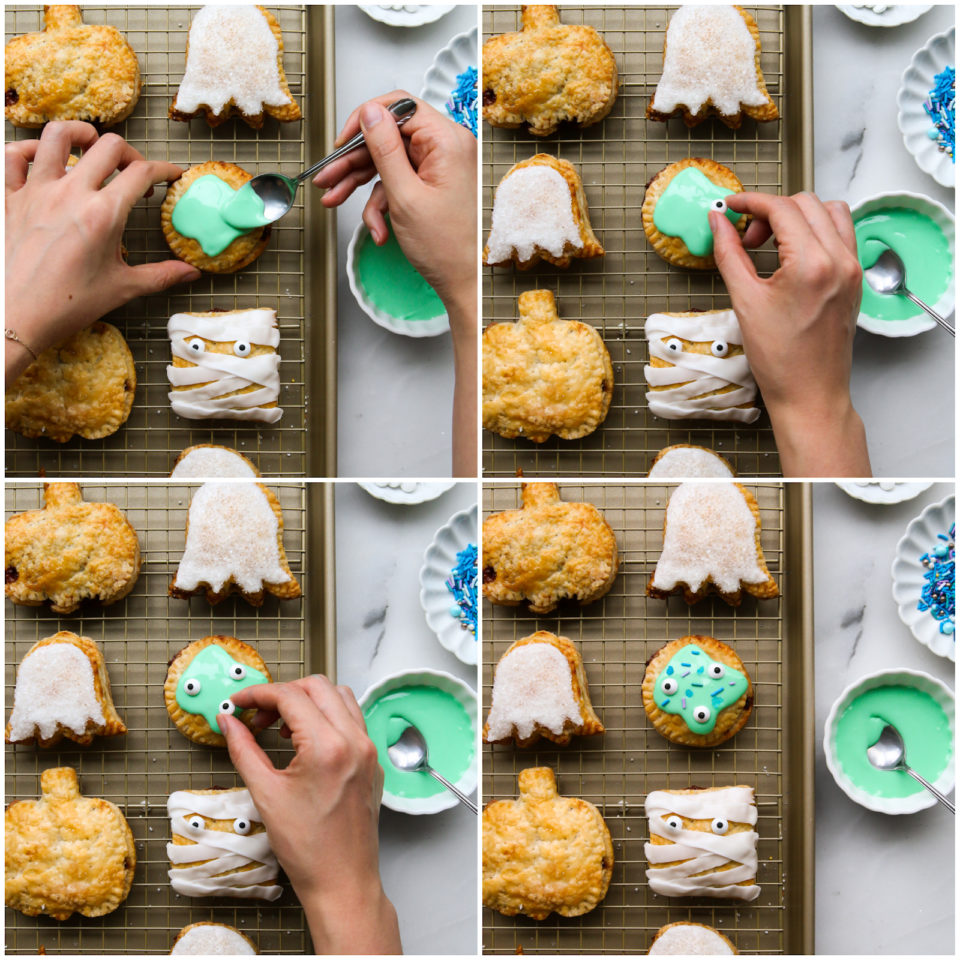
What makes these Halloween breakfast tarts so fun is the decorating. I used a simple royal icing coloured with gel food colour to ice these pies and decorated with some fun candy eyeballs and sprinkles. I highly recommend decorating in a cooling rack with sheet pan underneath so any excess sprinkles will collect at the bottom and not get stuck to the sides of your breakfast tarts. Scroll to the end of the recipe to see some decorating ideas.

Equipment
- Goldtouch® Nonstick cookie sheet
- Goldtouch® Nonstick half sheet pan and cooling rack
- Cookie cutters of choice
Ingredients
- 1 batch all-butter pie dough
- 1 batch brown sugar filling
- Royal icing, to decorate
- Sprinkles and candy eyeballs, to decorate
All-Butter Pie Dough
- 2 1/2 cups (300 g) all-purpose flour
- 1 tbsp (13 g) granulated sugar
- 1 tsp salt
- 1 cup (227 g) very cold unsalted butter, cut into 1⁄2-inch pieces
- 1 1/2 cup (120 ml) cold water
- 1 1/2 cup (110 g) ice cubes
- 1 tbsp (15 ml) apple cider vinegar or white vinegar
Egg Wash
- 1 large egg
- 1 tbsp (15 ml) whole milk
Brown Sugar Filling
- 2/3 cup (134g) brown sugar
- 1 tbsp (6g) all-purpose flour
- 2 tsp ground cinnamon
- 1/2 tsp salt
Royal Icing
- 2 cups (240 g) powdered sugar
- 2 tbsp (15 ml) whole milk or water
- Gel food coloring, as needed (optional)
Instructions
All-Butter Pie Dough
- Make the all-butter pie crust. In a large bowl, stir together the flour, granulated sugar, and salt. Add the butter. With a pastry cutter or a fork, quickly cut the butter into the flour mixture until mostly pea-size pieces of butter remain (a few larger pieces are okay).
- In a large measuring cup or a small bowl, combine the water, ice, and vinegar. Sprinkle 2 tablespoons (15 ml) of the ice-water mixture over the flour mixture and mix with a spatula until the water is fully incorporated. Add more of the ice-water mixture, 1 to 2 tablespoons (15 to 30 ml) at a time.
- Using the spatula or your hands, mix until the dough comes together in a ball with some dry, shaggy bits remaining. Squeeze and pinch the dough with your fingertips to bring all the dough together, sprinkling dry bits with 1 to 2 tablespoons (15 to 30 ml) of the ice-water mixture, if necessary, to combine.
- Divide the dough into 2 portions. Shape each portion of dough into a flat disk, wrap each disk in plastic, and refrigerate the dough for at least 1 hour (or overnight), to give the dough time to rest.
Egg Wash
- In a small bowl, whisk together egg and milk. Set side.
- Brown Sugar Filling
- In a small bowl, whisk together the ingredients for the filling. Set aside.
To assemble
- Preheat the oven to 350°F (177°C). Line cookie sheet with parchment paper. The Goldtouch® Nonstick cookie sheet is super nonstick, but I like to still use a piece of parchment for easier clean up.
- On a floured work surface, roll out the disk of dough until it reaches 1⁄4 inch in thickness. Using cookie cutters of choice, stamp out an even number of shapes. Transfer half of the shapes to the cookie sheet.
- Using a pastry brush, brush a thin layer of egg wash to the cut outs on the cookie sheet. This will help seal the edges of the pies when baking.
- Place a spoonful of the brown sugar filling in the centers of half of the cut outs, about 2 teaspoons for smaller cut outs and 1 tablespoon for larger cut outs. Take a second cut out of the same shape and gently lay it on top of a filled cut out. Using the tines of a fork, press down on the edges to seal the hand pie. Once all the hand pies have been sealed, use the fork to prick holes in the tops to allow steam to escape during baking.
- Apply a thin layer of egg wash to the tops of each pie.
- Bake the hand pies for 24 to 28 minutes, until they are golden brown. Remove the hand pies from the oven and allow them to cool on the baking sheet for 10 minutes. Transfer the hand pies to a wire rack to cool completely before decorating
Royal Icing
- Make the royal icing glaze. In a medium bowl, whisk together the powdered sugar and milk/water. Add more milk if too thick or more icing sugar if too runny. You want the consistency to be similar to honey. Divide the royal icing into smaller bowls and colour the icing to desired colours.
- Using the back of a small spoon or with royal icing transferred to a piping bag, spread a thin layer of the royal icing glaze on each cooled hand pie. To garnish the hand pies, add sprinkles and candy eyes on top of the glaze before it sets.
Some decorating ideas:
1. Cute ghosts
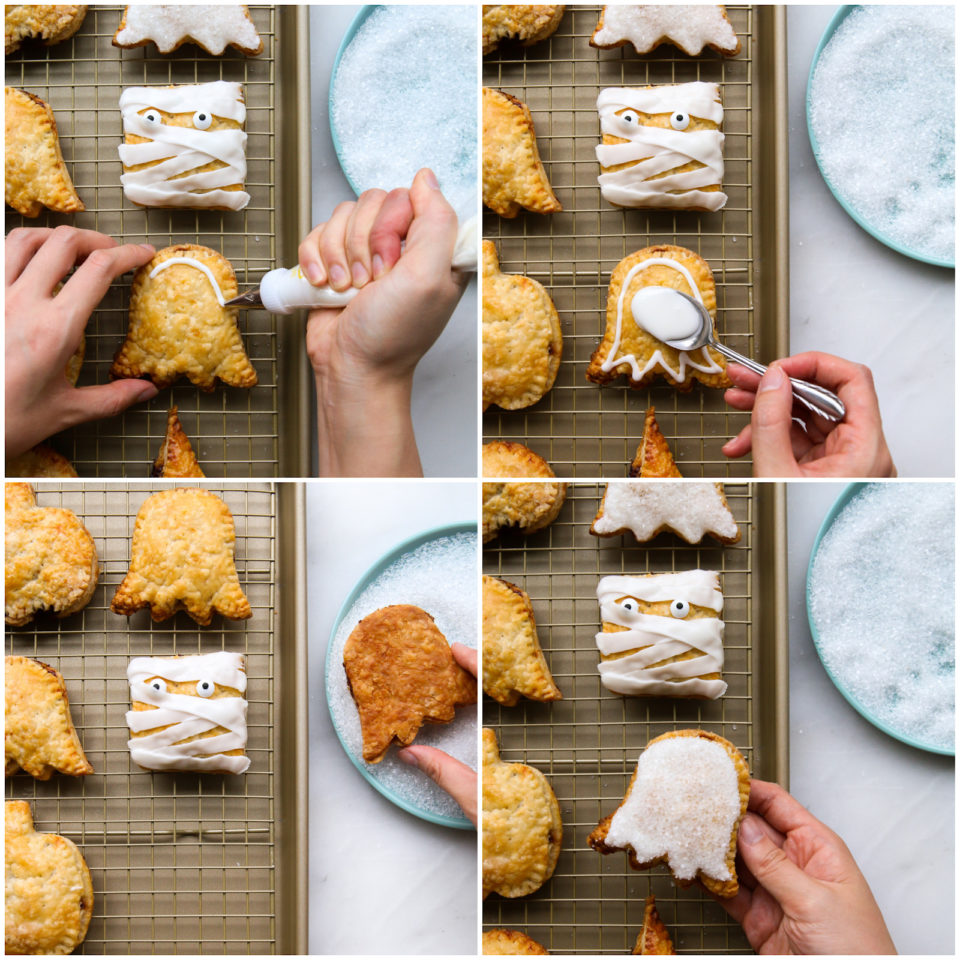
2. Mummies
3. Classic Jack-o-lantern
4. Spooky slime

Happy baking!


Family tree maker 2019 says
Discover Your Family Story With Family Tree Maker!
The available version with the FTM users is FTM 2019 functioning for both Mac and Windows.
Family Tree Maker 2019
The release year of FTM Software is 1989 and it’s been almost more than thirty years since
then. Today, FTM stands as the World’s Favourite Genealogy Software. FTM is making it much
easier than ever before to discover your family history, preserve your legacy, and share
your
unique heritage.
Family tree maker 2019 says
Discover Your Family Story With Family Tree Maker!
The available version with the FTM users is FTM 2019 functioning for both Mac and Windows.
Family Tree Maker 2019
The release year of FTM Software is 1989 and it’s been almost more than thirty years since
then. Today, FTM stands as the World’s Favourite Genealogy Software. FTM is making it much
easier than ever before to discover your family history, preserve your legacy, and share your
unique heritage.
jennifer smith says
Honda navigation update
Every user can update the honda navigation system with ease. All you have to do is follow some basic instructions, and you can update the honda Navi by yourself. Most of the time, customers ask whether their updates are free or paid.
We want to inform you that all Honda Navi updates are free of cost most of the time. A few times, the updates are paid if you have an older honda vehicle. Many times consumers end up paying a good amount of money to the local dealers. We want to inform you that you can get the updates for yourself without paying any additional fees or charges if you can follow some basic steps.
Amanda says
hello!! I’m wondering what wilton tip you used for the mummy? thanks!!
Amarjit Mishra says
Thank you, Shearing, for the positive information. In this blog, you will find very useful information.