


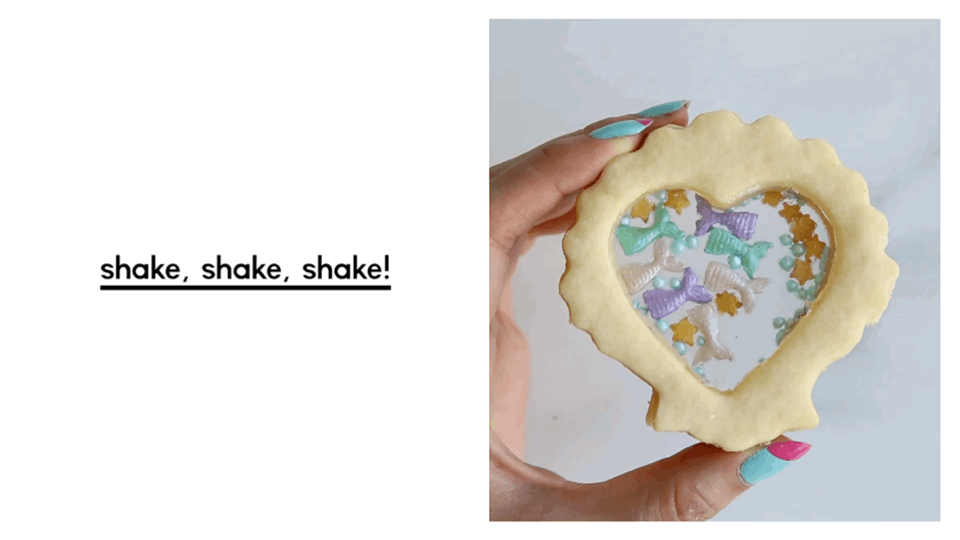
Every time I post a shaker cookie video, I always get quite a few comments and DMs asking me if I could do a full tutorial on how to create these sprinkle-filled cookies. I actually have shared two separate tutorials in the past (for totoro shaker cookies and this one for Chinese New Year) and each tutorial has its own unique tips and tricks for creating their respective cookies. I thought it would be a good idea for me to create the ultimate guide here, where I combine the techniques from both of those tutorials and any additional things I have learned throw making numerous shaker cookies. Sometimes I find it difficult to follow along written instructions for a tutorial that involves many unfamiliar techniques, so at the end of this tutorial, you will find step-by-step videos to fully illustrate what it takes to create the perfect shaker cookie. If you absorb audio instructions better, I also have a talk-through tutorial on my IGTV. I hope you find it helpful!

How to make shaker cookies
Instructions
For the cookies
- Choose a cookie dough recipe. (See note below.)
- With a cookie cutter of choice, cut out as many cut outs as you can and transfer the cut outs to a large lined baking sheet. With a smaller square cookie cutter, punch out a cut out in the centre of each larger cookie. It is important that you make the smaller square cut out once the larger cut out has been transferred to the cookie sheet, or else the cookie will lose its shape when you try to transfer it. Transfer the baking sheet with the cookie cut outs to the freezer and chill the cut outs until firm, about 10 minutes. The more chilled the cut outs are, the less likely they will spread or lose their shape in the baking process.
- While the cut outs are chilling, gather the smaller cut outs that you have removed from the larger shapes. Re-roll that dough and repeat the previous steps until all the cookie dough has been used up. If the dough starts to get soft, chill the dough again before cutting out the shapes.
- Bake the chilled cookie cut outs according to your recipes instructions, until the edges of the cookies are golden. Keep in mind that your cookies will require less baking time than the original cookie recipe because you have a cut out in the centre, allowing the cookie to cook faster. A smaller cookie will require less bake time and a larger cookie with a thicker border will take longer. I recommend checking the cookies at the 5-minute mark. Once the cookies are ready, remove the baking sheet from the oven and allow the cookies to cool completely on the baking sheet before handling. They will be very delicate. Transfer the cookies onto another baking sheet lined/surface with a clean piece of parchment (any crumbs will get ‘trapped’ inside the isomalt). We will be pouring the isomalt on this surface.
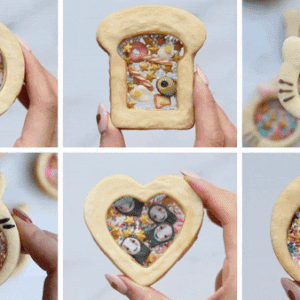
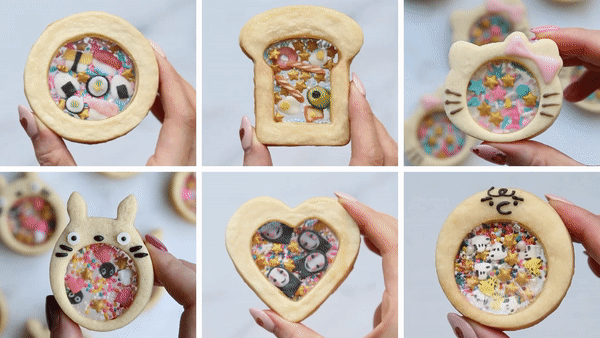
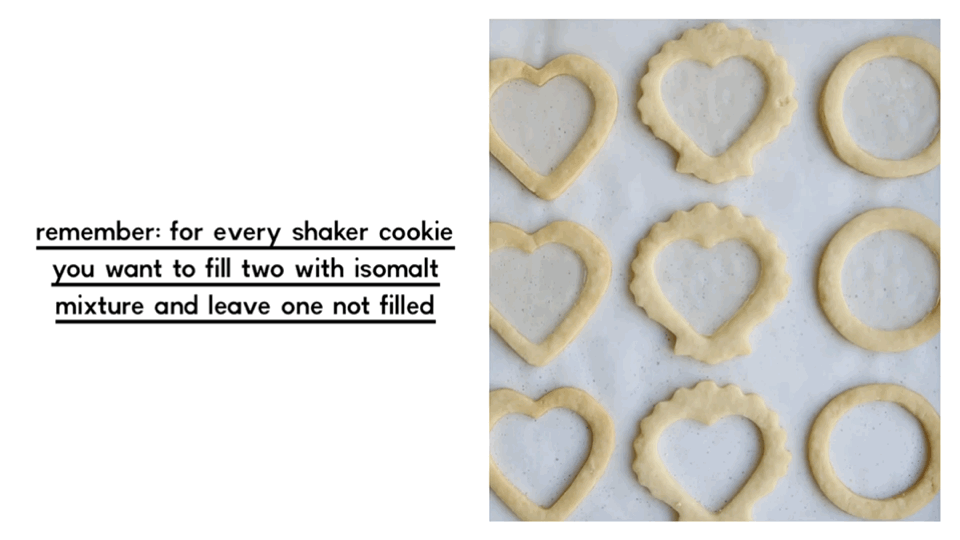
- Keep in mind that you will need three cookies per shaker cookie: 1) top cookie which will be filled with isomalt and decorated; 2) middle cookie will 'raise' the cookie so the sprinkles can move freely inside the cookie; 3) bottom cookie will be filled with isomalt
For the isomalt
- You will only need two ingredients to cook clear isomalt: isomalt crystals and water. For every cup of isomalt you cook, you will need 1/8 of that amount of water (ex. 1/8 cup of water for every 1 cup of isomalt). The more shaker cookies you are making, the more isomalt you will need. I like to start with at least 1/2 cup of isomalt crystals. You can always make more if you run out while filling your cookies.
- Preheat oven to 265F.
- Place the isomalt crystals in an oven-safe small pot over medium heat and allow the isomalt crystals to melt without stirring them. Once the isomalt is boiling, remove the small pot from heat. Isomalt will be very bubbly. Hold the small pot off of the heat until the bubbles settle down. Careful to not let the isomalt cook too long on the stove or else it will turn an amber colour like caramel.
- Once the bubbles have settled down, place the pot back down on the burner and stir in the water, a little at a time. Steam will aggressively come off of the sugar as the water is now cooling it down. Isomalt will still be very bubbly.
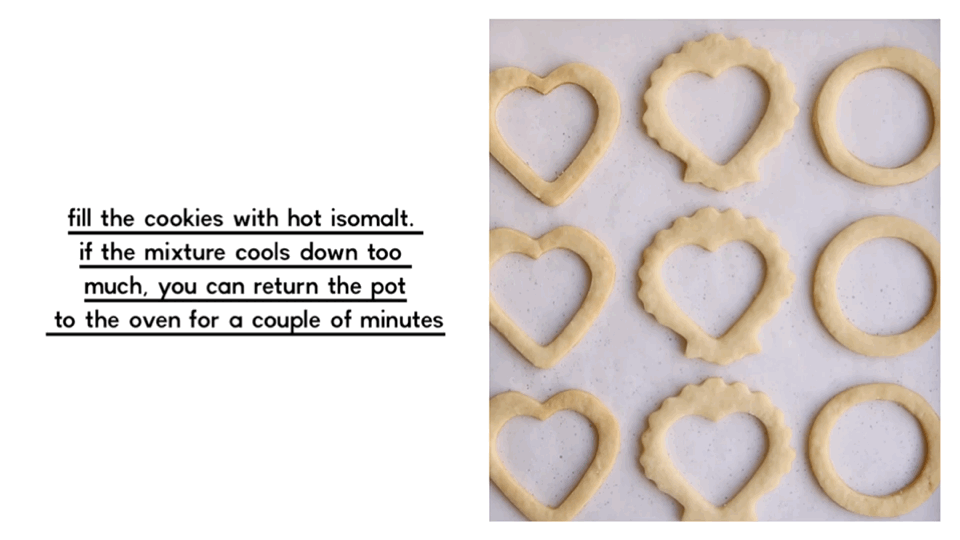
- Reduce the amount of air bubbles in the hot isomalt by placing it in the oven at 265F for 8 – 10 minutes. If you skip this step, the bubbles will stay in the isomalt and will harden with the bubbles still visible. After 10 minutes, carefully remove pot of isomalt from oven and use the isomalt while it is still hot. Carefully pour the hot isomalt into the centres of each cookie cut out and spread the isomalt to the edges and corners of each cookie with a small spoon. If the isomalt starts to thicken, place it back in the oven for 2 – 3 minutes, or until it liquefies again. Allow the isomalt to cool completely before moving the filled cookies, at least 10 minutes
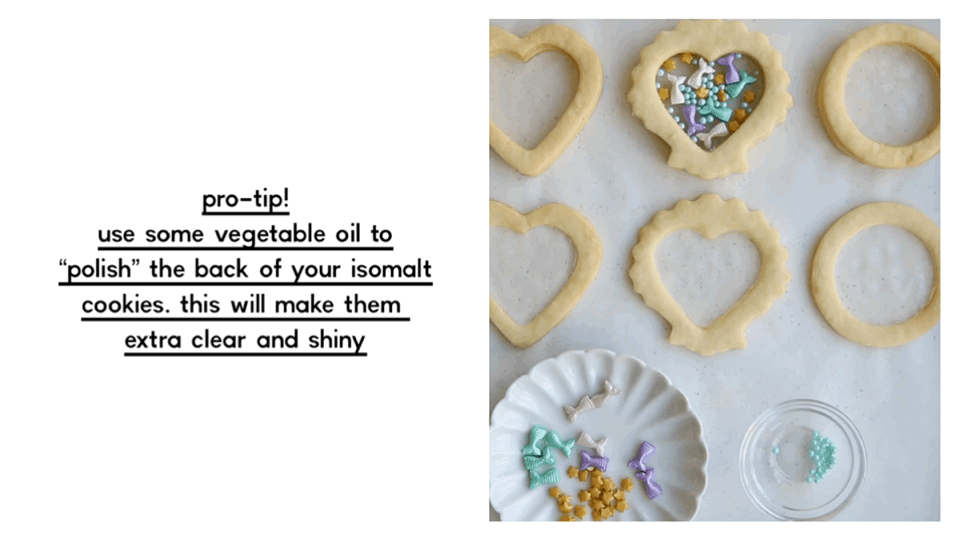
- Once the isomalt has set, take a piece of paper towel and dab it into a small dish of oil (I use vegetable oil). Gently polish the back side of the isomalt (the side that was on the sheet tray). This will make the isomalt extra see through and remove any cloudiness.
To assemble
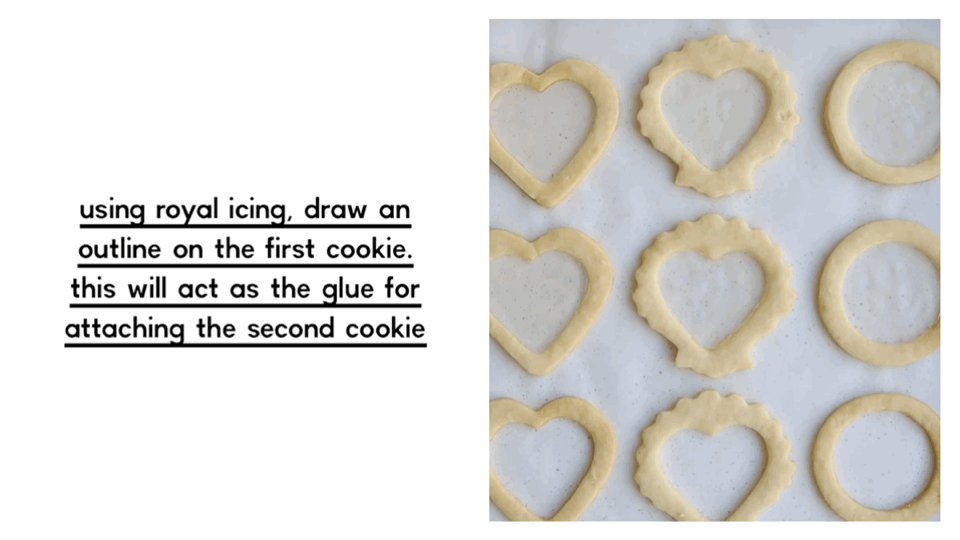
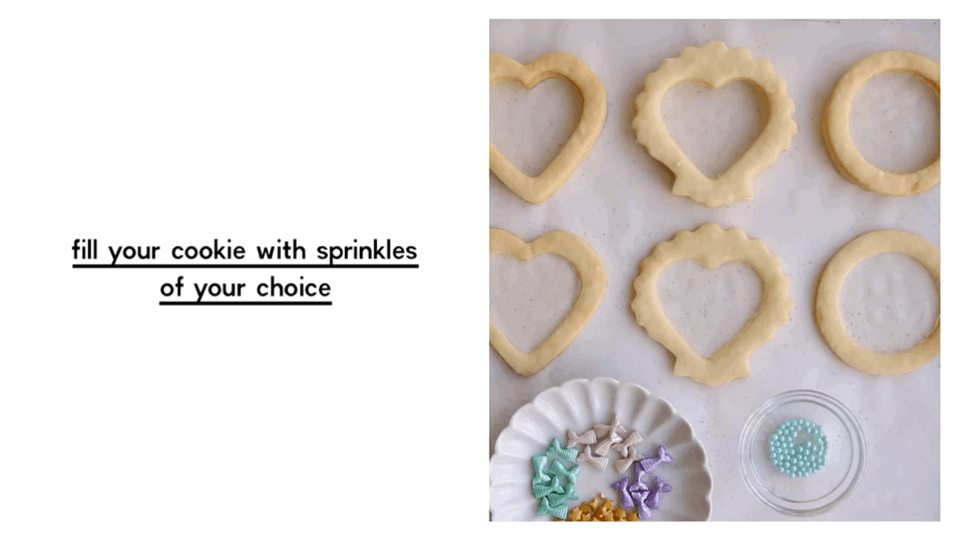
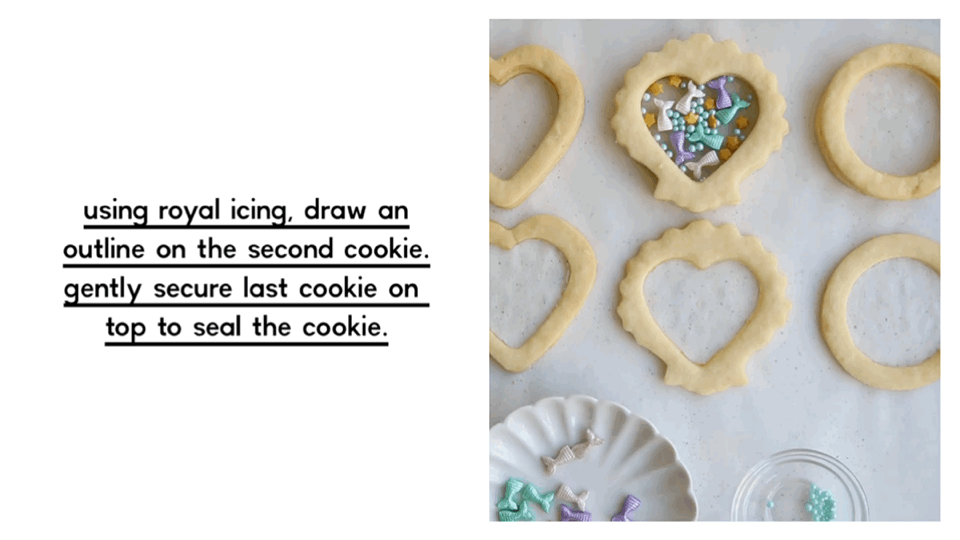
- Place one isomalt-filled cookie down. Apply royal icing to the edges of the cookie, being cautious to not get any icing on the ‘glass.’ Stack the hollow, unfilled cookie before the royal icing dries. Fill your cookie with sprinkles of choice. Create another outline with royal icing. Stack the last isomalt-filled cookie to ‘seal’ the cookie. Decorate the top of each cookie.
Notes
Happy baking (and shaking)!


WVAtty says
Michelle from Hummingbird sent me over here. Amazing! And nice presentation of the instructions. Thanks!
Unknown says
This looks amazing!
Jojo says
Hi, I have a question. How do you store them to dry after you decorate with icing?
Sarah says
Do you know of any isomalt alternatives that would work here? (My daughter is allergic to peanuts and all the isomalt brands I can find are manufactured on equipment with peanuts and therefore not safe for her). Thanks for any ideas you have!
The Amateur Baker says
Hi I was excited to make shaker cookies for the first time. I’m not sure what I did wrong with the Isomalt but it never hardened. Was I supposed to pour a thin layer? I prepared a sheet pan with parchment paper but the Isomalt got stuck. Any advice? Thanks
Lo says
Hello!! How do you keep the isomalt from sticking to the inside??
Lo says
I see it!!💜💜💜
carolina says
Hola !! tu receta me encanta !! mi duda es cuando hablas de poner la olla al horno a 265F, eso es literal horno? o te refieres a continuar con la olla a fuego?
Caren says
You are an AMAZING baking/decorating artist. I really want to make these BUT Ian a beginner at baking & not very good a decorating. These cookies too you’ve made w/the isomalt are so pretty & I really want to make them but once again I’m not sure if I’m quite ready to take isomalt. Lol!!
Caren Shelton says
Love your shaker cookies. Maybe more like obsessed with these delicious delights.