x
  • Home
  • Recipes
  • Press
  • About
  • Let’s talk!
Instagram Pinterest BlogLovin
Home › tutorials › Sweet & Petite Gingerbread Houses (with Wilton!)

Facebook0Tweet0Pin0

link to follow on instagram  link to follow on Pinterest  Follow on Bloglovin

  • Skip to primary navigation
  • Skip to main content
  • Skip to primary sidebar
  • Skip to footer
Constellation Inspiration

Constellation Inspiration

A Dessert Blog

  • Cookbook
  • Tutorials
  • About
    • Press
  • Contact
  • Recipes:
  • cake
  • cookies
  • cream puffs
  • tarts
  • bars
  • candy
  • Asian-inspired
  • seasonal
    • Valentines
    • halloween
    • christmas
Leave a Comment
tutorials

Sweet & Petite Gingerbread Houses (with Wilton!)

by: Amy on: Dec 8, 2020

It’s my favourite time of the year! Gingerbread house decorating time! Please note I said gingerbread house decorating and not baking because the baking part is just a necessary evil for us to get to the happy place...

Review

It’s my favourite time of the year! Gingerbread house decorating time! Please note I said gingerbread house decorating and not baking because the baking part is just a necessary evil for us to get to the happy place that is decorating. That’s why I buy a gingerbread house kit every year. I get to spend more time decorating the houses with my family, and less time crossing my fingers that my homemade gingerbread house panels don’t lose shape while in the oven.

Throughout the years I’ve purchased many different brands and types of gingerbread house kits. My *biggest* problem with many of the kits out there is that they NEVER give you enough icing to assemble and decorate the house — by the time you go to assemble the panels, there just isn’t enough icing to make everything secure. In the recent years, I’ve gravitated towards buying better quality gingerbread house kits, like this one from Wilton, which give you more than enough supplies and decorations to make the perfect house. This year I’m using the Wilton Build It Yourself Sweet & Petite Gingerbread House Decorating Kit and decorating three houses in three different ways and sharing some of my tips and tricks for gingerbread house decorating in this post. If I miss any tips that you love, please let me know!

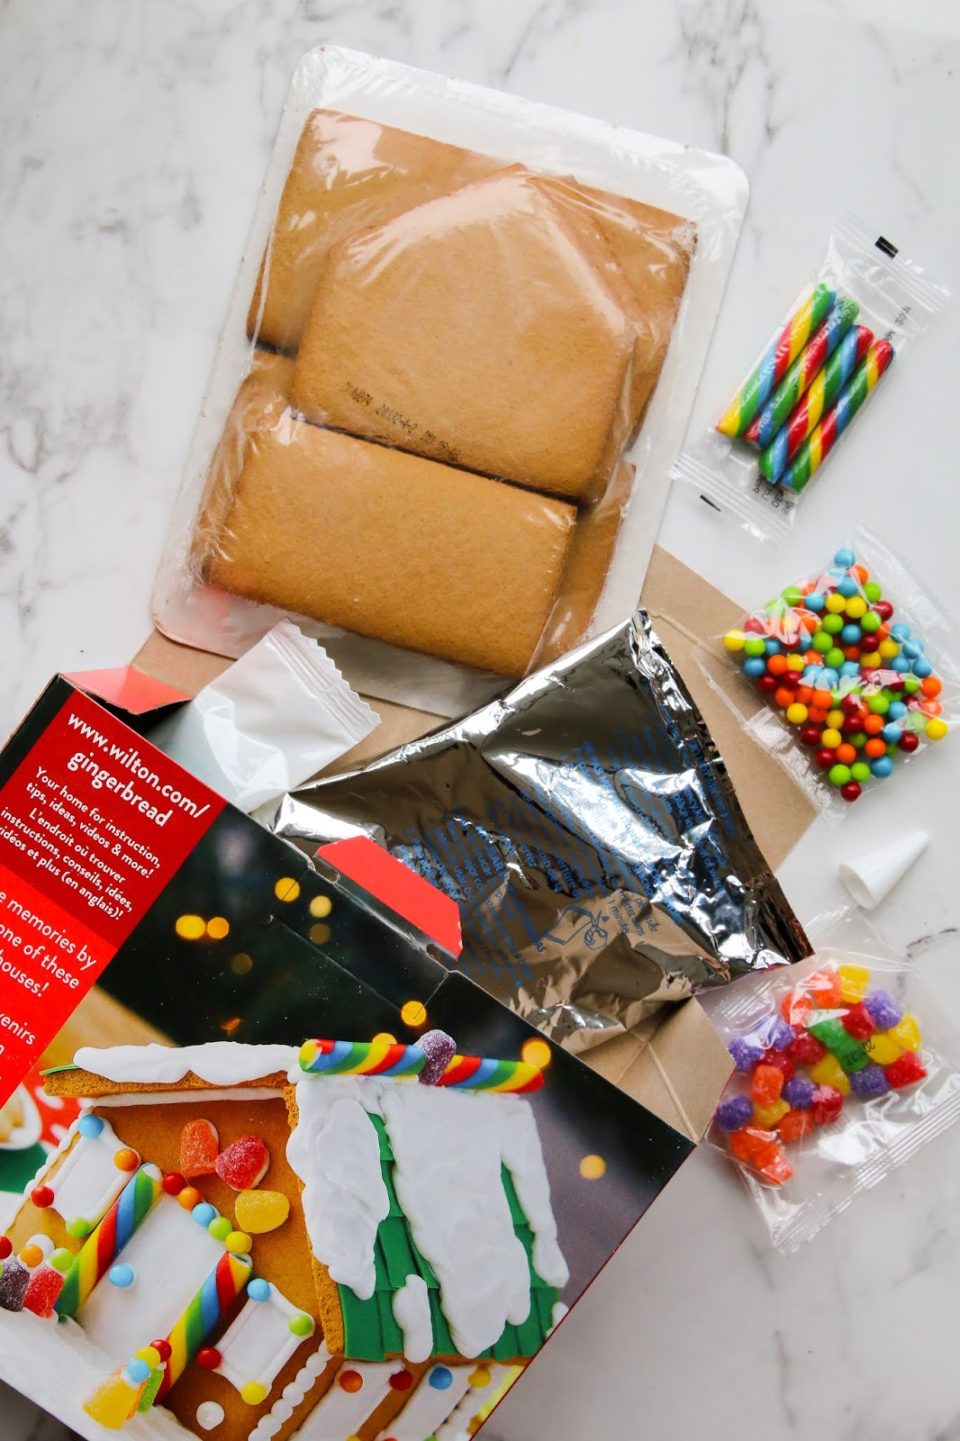
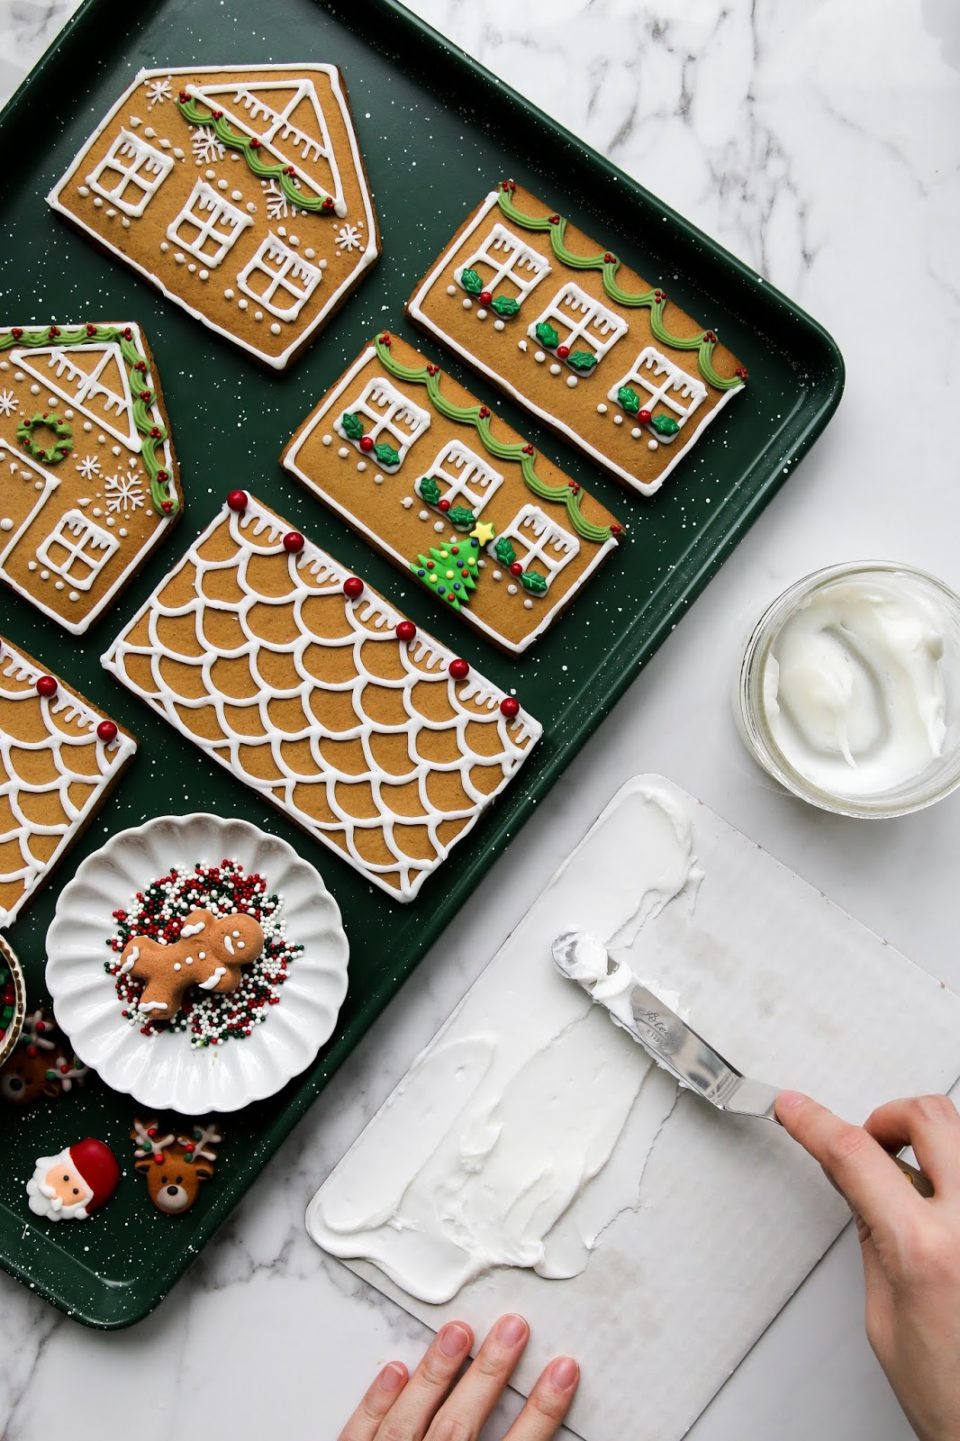
Each Sweet & Petite Gingerbread House Kit comes with everything you need for decorating: 6 pre-baked gingerbread house panels, 3 types of candy, green fondant, white ready-to-use icing, decorating bag and tip, and an instruction sheet. In previous years, I’ve used exclusively the decorations that came in the kit but this year I decided to add a few extra touches to make the gingerbread house even more special. In addition to what is included in the kit, I used: different kinds of holiday sprinkles from Wilton, icing decorations, an open-star piping tip, and a bit of green food colouring.

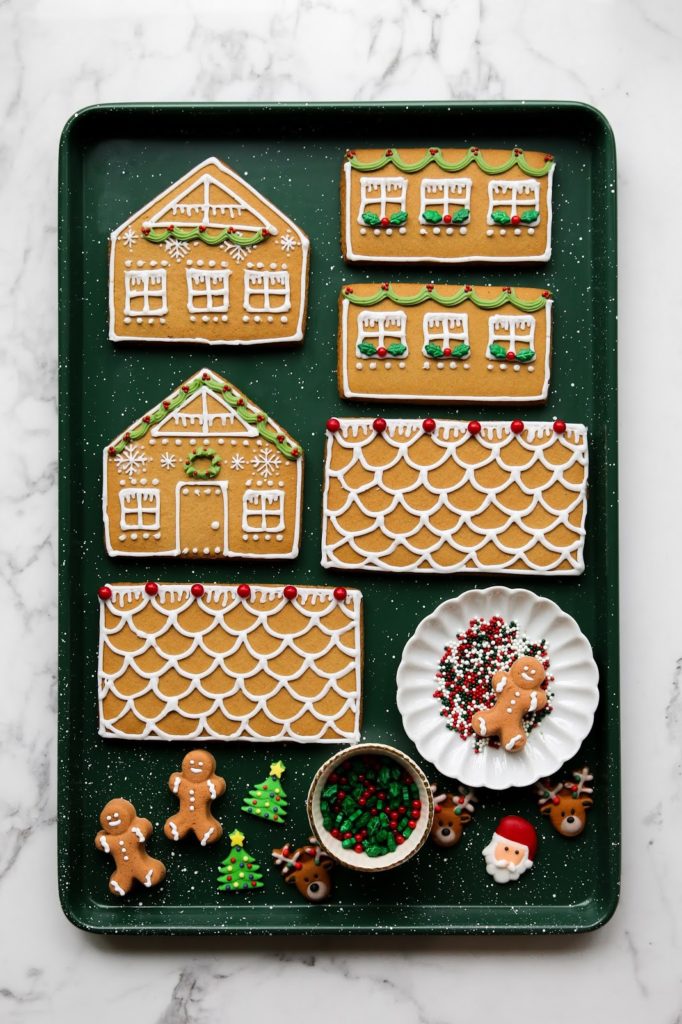
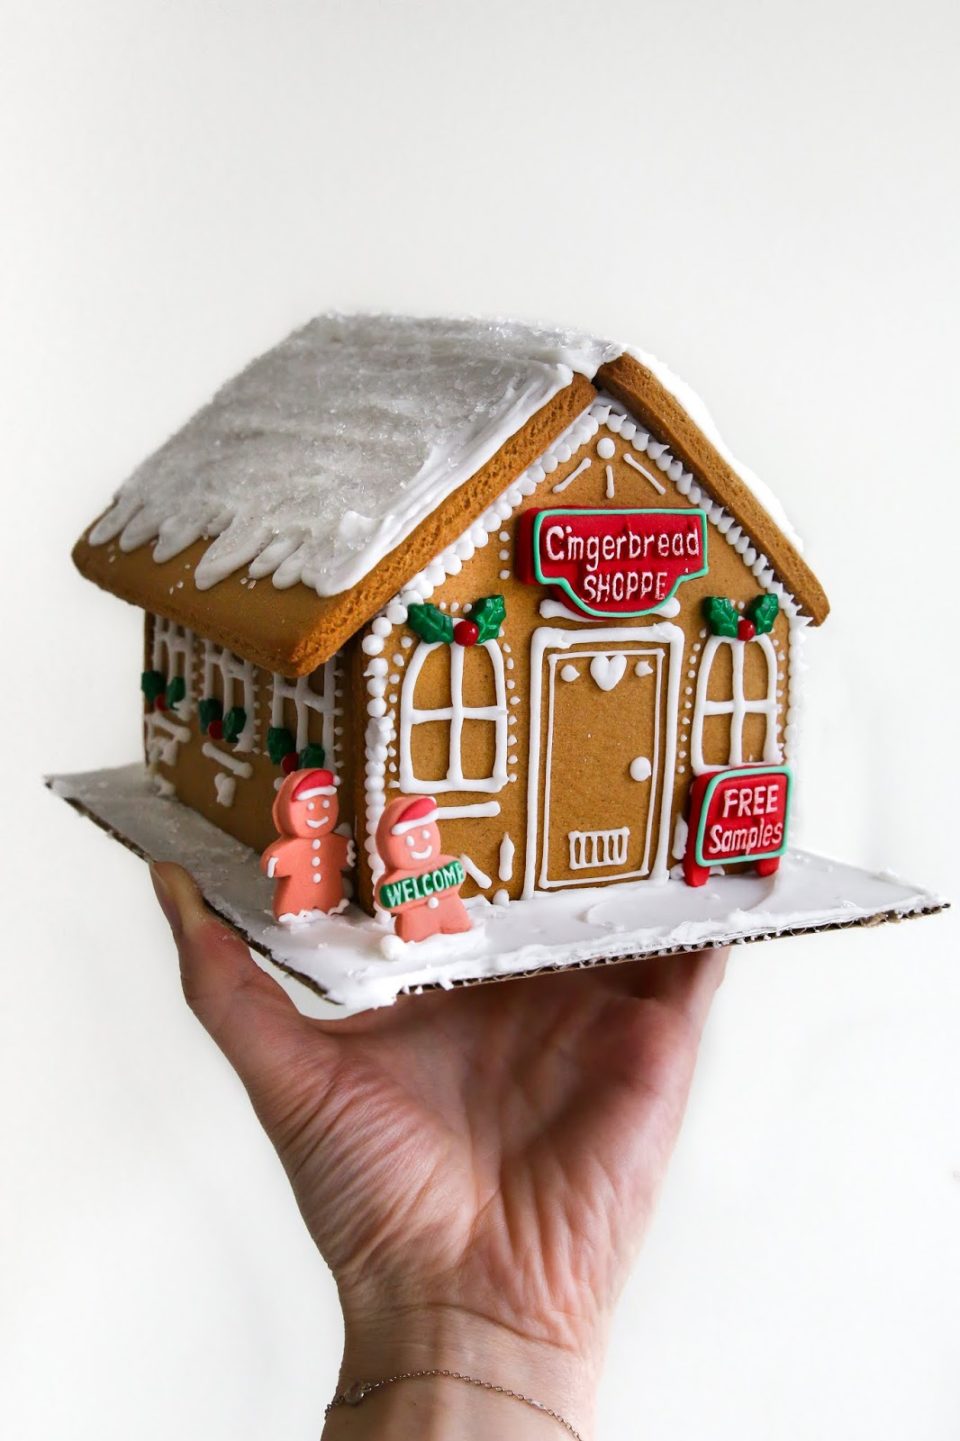
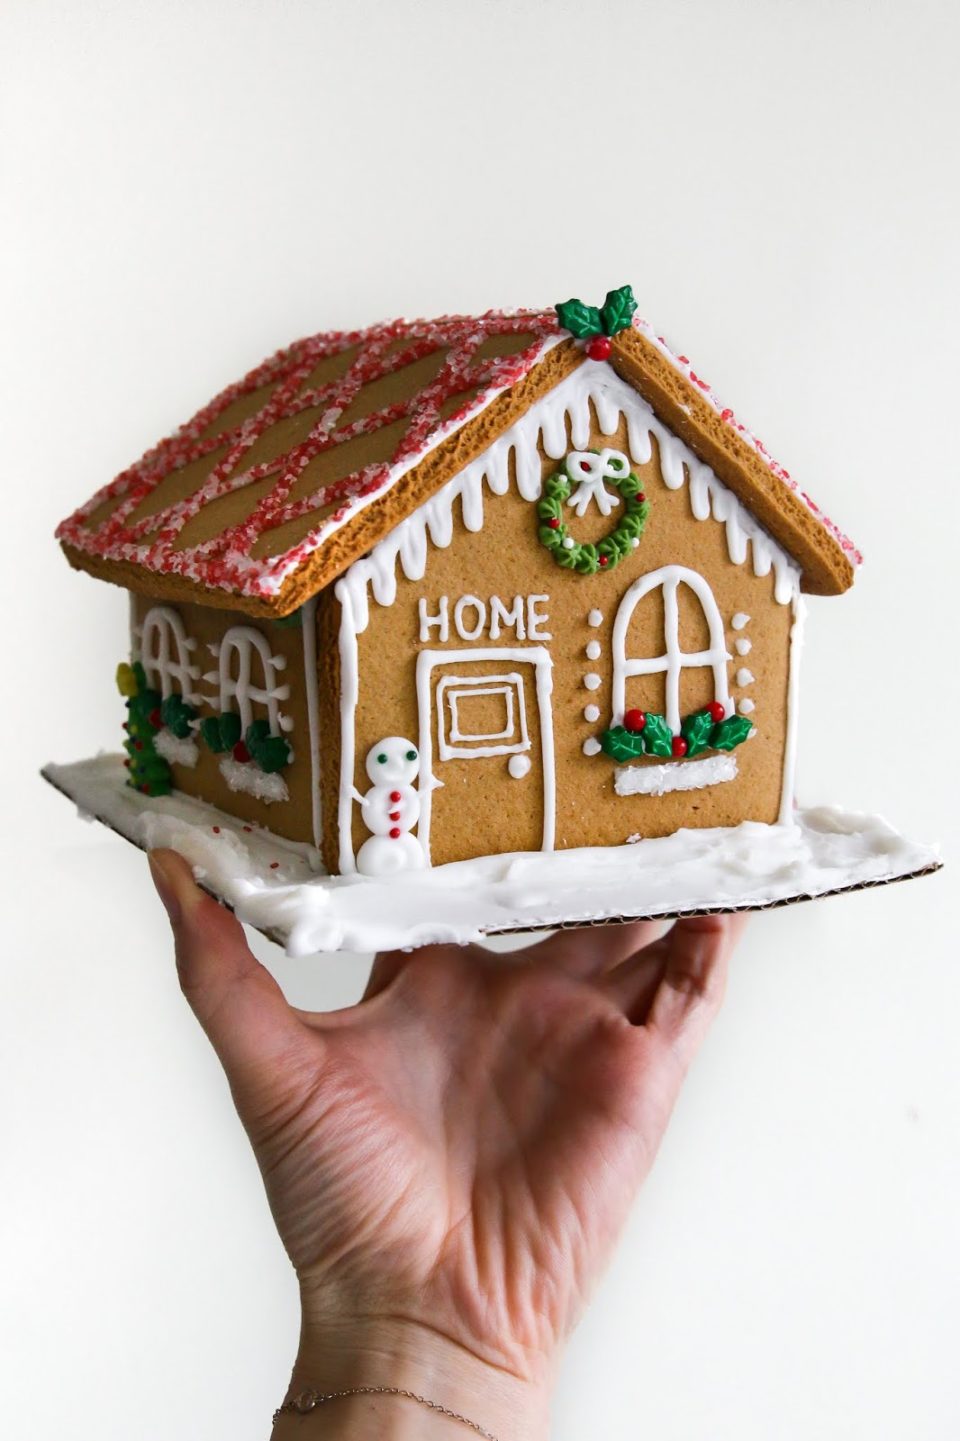
My biggest tip for gingerbread house decorating is to decorate the panels before you assemble the house. It’s much easier to pipe the details on the panels when they’re lying flat. I transferred the icing that came with the kit into the piping bag with the small round piping tip to pipe out the outline and other details of the house. I reserved some of the icing to colour green to pipe the wreath and holly garland for the house. To pipe the wreath, transfer the green icing into a piping bag with an open star tip.

My second tip is to use sprinkles strategically for patterned designs, rather than sprinkling them randomly on the icing. I used the red nonpareils to make the berries for the holly garland and Wilton’s holly mix sprinkles to accent the side windows. The easiest way to work with very small sprinkles like the nonpareils is to use tweezers or get a toothpick with a bit of the icing at the end to transfer the nonpareil from the jar to the house.
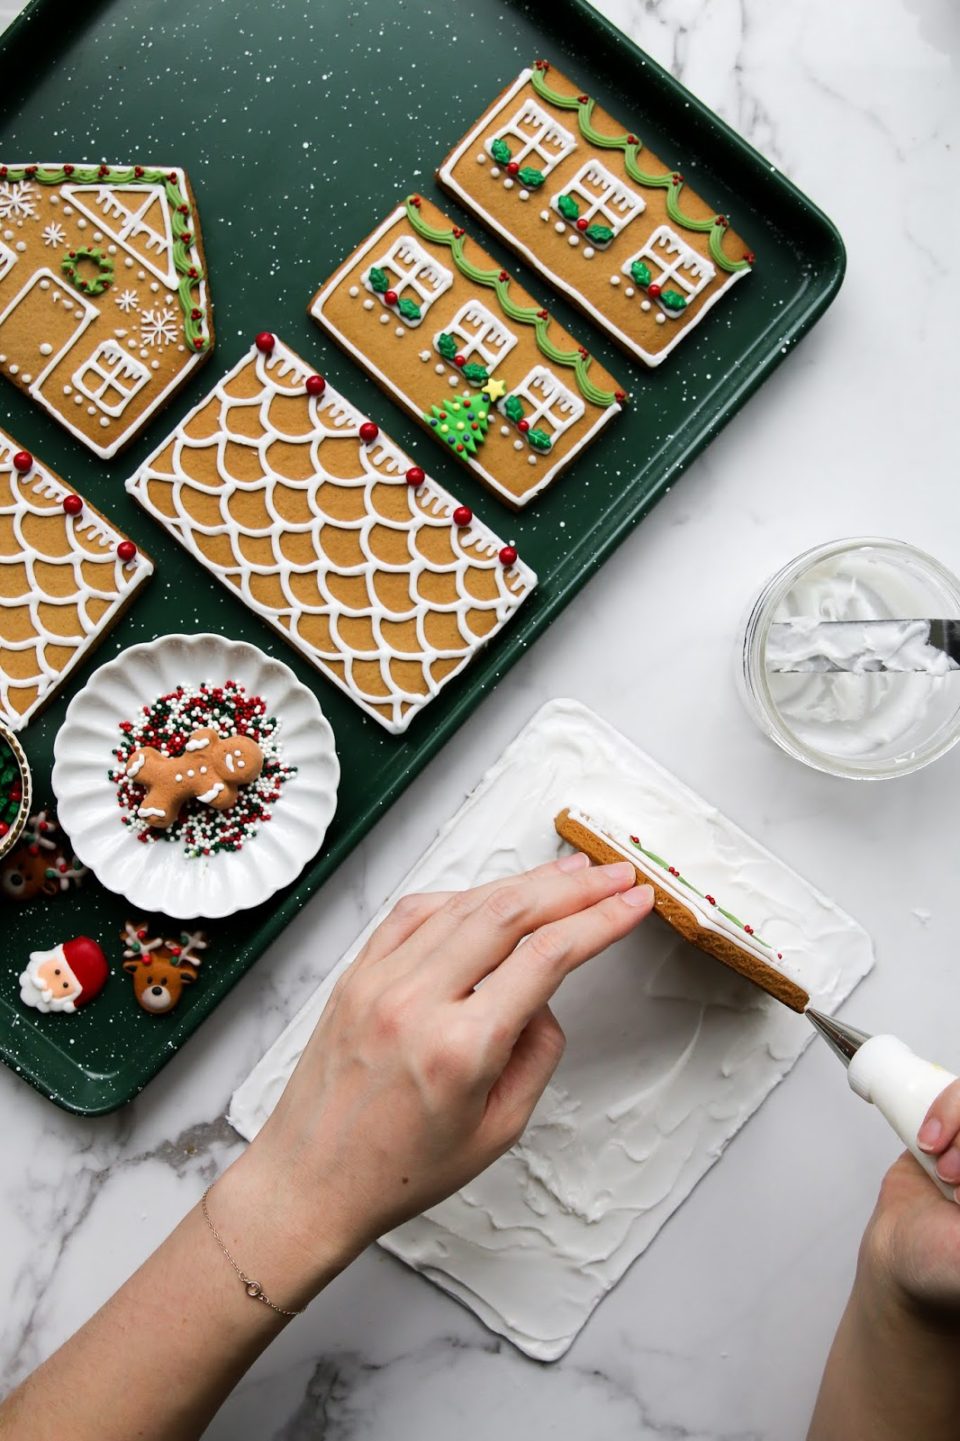
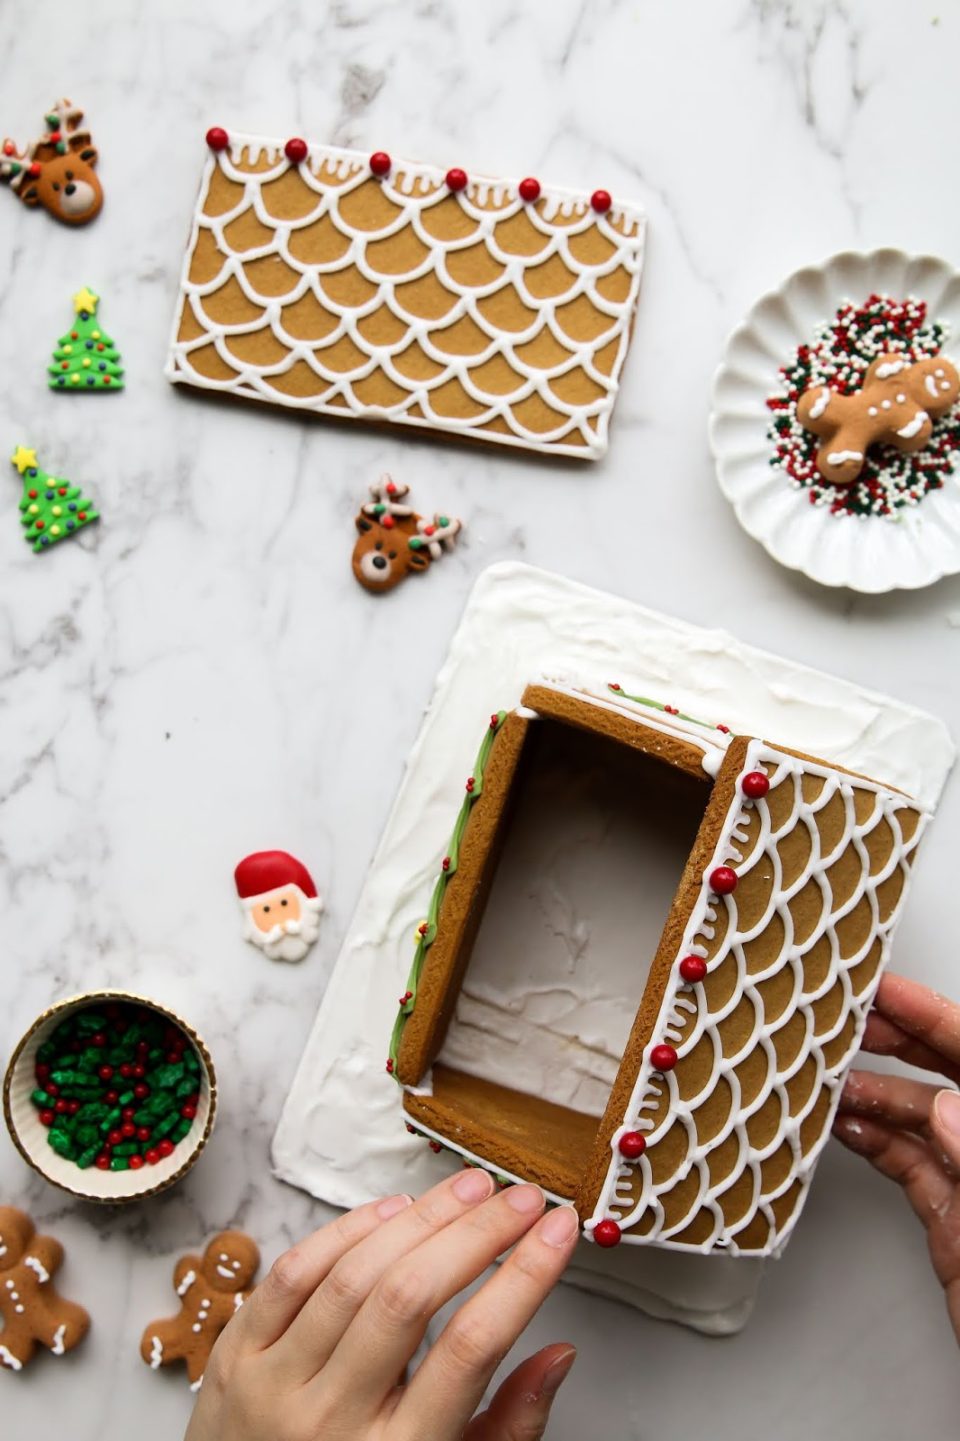
Allow all the icing on the gingerbread house panels to fully dry before assembling the house. Because the kit came with so much white icing, I had enough to cover the top side of the cardboard with icing to resemble snow. Applying this thick layer of icing also allows your house to set more securely. Assemble the house by piping the icing to adhere the pieces to each other and allow it to dry. I always find that attaching the roof is the hardest part because it tends to slide while it dries. What I do is that I hold the roof in place for several minutes, allowing the icing to set before letting it dry completely.

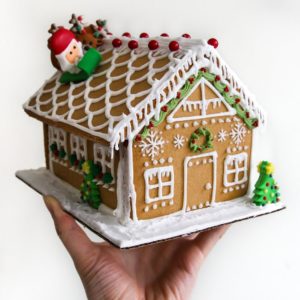
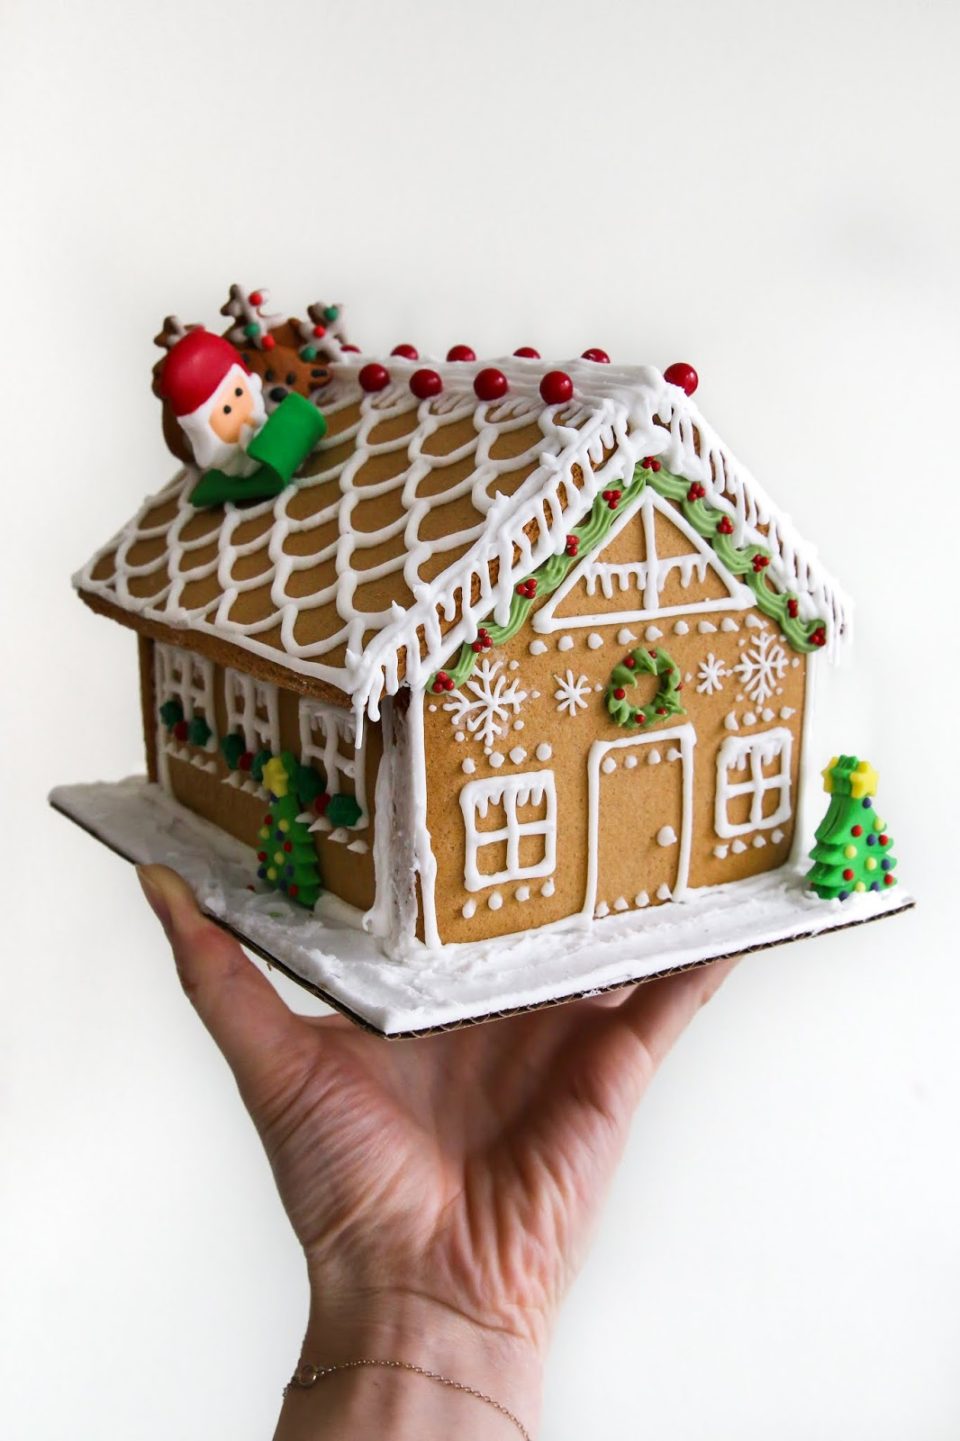
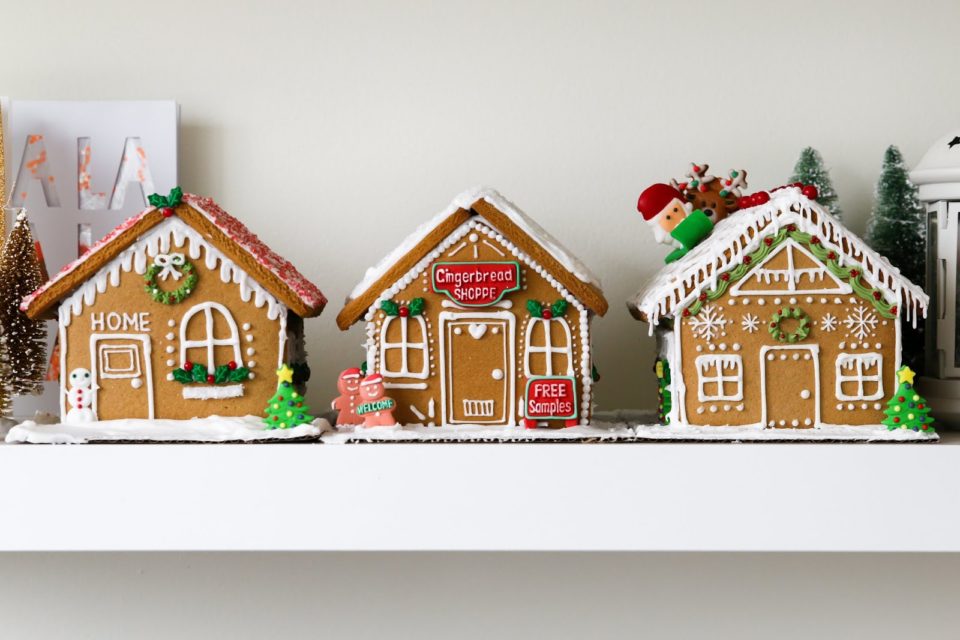
Another tip is to use the fondant that comes with the kit for something creative and unexpected. Instead of making the door or covering the roof with the fondant, I rolled out the fondant and cut it into a small rectangle to form Santa’s sleigh. I curved one end of the fondant and allowed it to dry while resting against a cup, so it keeps that shape. Once it has dried, attach the sleigh onto the roof the assembled house and add Santa and his reindeers.
Here are the three houses I made with the Sweet & Petite Gingerbread House Kit! I placed them next to each other on my bookshelf so it looks like a little gingerbread village.

Thank you Wilton for supporting this blog. Head over to the the Wilton website for helpful tutorials and videos for gingerbread house assembly and decorations. While the post is sponsored by Wilton, all opinions are my own!

more like this:

Coconut Snow Globe Cupcakes

Halloween Brown Sugar Breakfast Tarts

The Ultimate Shaker Cookie Tutorial

Reader Interactions

Leave a Reply Cancel reply

Your email address will not be published. Required fields are marked *

Recipe Rating


Sweet Comments:

  1. Zimara says

    Dec 25, 2021 at 6:52 pm

    Amei a maneira de montar a casa já com as peças decoradas. Obrigada

    Reply

Primary Sidebar

a sweet hello.

Welcome to Constellation Inspiration, a buttercream-coated journal of recipes, stories, and love letters that are sweet to read, and even sweeter to eat. These love letters are dedicated to you.

sneak peaks & bonus recipes!

Sign up to get them for free:

featured

a new strawberry rolling pin for spring! 🍓 som a new strawberry rolling pin for spring! 🍓

some tips for using an embossed rolling pin:
 - choose a shortbread or sugar cookie recipe that has no egg or leaveners (baking powder, baking soda)
- roll out cookie dough with a regular rolling pin, then chill dough in freezer for 5 - 10 minutes until it is slightly firm (dough should no longer be sticky)
- generously flour embossed rolling pin before using
- you can also flour the surface of the rolled, smooth cookie dough to be extra safe
- after rolling out dough with embossed rolling pin and stamping cut outs with a cookie cutter, freeze cookie cutouts on lined baking sheet before baking — this will help the cookies retain the design during the baking process

#bakefromscratch #cookiedecorating #shortbread #bombesquad #cookiedough
cherry blossoms are starting to bloom in vancouver cherry blossoms are starting to bloom in vancouver and i’m so excited to make all the mochi, dango, cookies, and jellies with one of my favourite flowers of springtime. here are some of my favourite cherry blossom treats from the previous years:

🌸 sakura cookie box
🍡 dango shortbread with matcha buttercream
🌸 hanami dango, warabi mochi, rose mochi
🍡 cherry blossom jelly cheesecake
🌸 window cookies
🍡 cherry blossom milk jellies
🌸 sakura sables

#bakefromscratch #mochi #dango #cookiebox #cherryblossoms
five easter cookies, one dough! made with @william five easter cookies, one dough!
made with @williamssonomacanada’s set of easter cookie cutters 🌷🌷🌷(ad)

marbled sugar cookies 
lemon sandwich cookies 
sparkly butterfly cookies
coconut sheep cookies
matcha vanilla carrot cookie

on the blog today im sharing all the details of how to make these five springtime cookies with my go-to shortbread dough and a set of easter cookie cutters. one batch of the dough creates all the cookies shown here.

link is in the bio!
#williamssonomacanada #williamssonoma #bakefromscratch #cookiedecorating #eastercookies
strawberry matcha cheesecake éclairs 🌷 these strawberry matcha cheesecake éclairs 🌷

these eclairs are a celebration of spring — crisp, golden brown choux pastry is filled with an intensely fruity whipped strawberry ganache and matcha cheesecake whipped cream, before being topped with it’s little hat glazed with a simple royal icing. i served these with edible flowers and edible gold flakes because we might as well go all the way. recipe is on the blog!

#bakefromscratch #choux #chouxpastry #eclair #matcha
happy first day of spring!! 🌷🌷🌷 spring i happy first day of spring!! 🌷🌷🌷

spring is one of my favourite seasons for baking because of all the delicate flavours that start blossoming this time of year. i can’t wait to make all the cherry blossom mochi, fruity pies, and floral shortbread.

#bakefromscratch #cakedecorating #cookiedecorating #sugarcookies #bombesquad

Footer

Recipe Index
About
Press
Contact
Legal

sneak peeks & bonus recipes!

Sign up to get them for free:

© 2023 Constellation Inspiration · Site by Meyne