


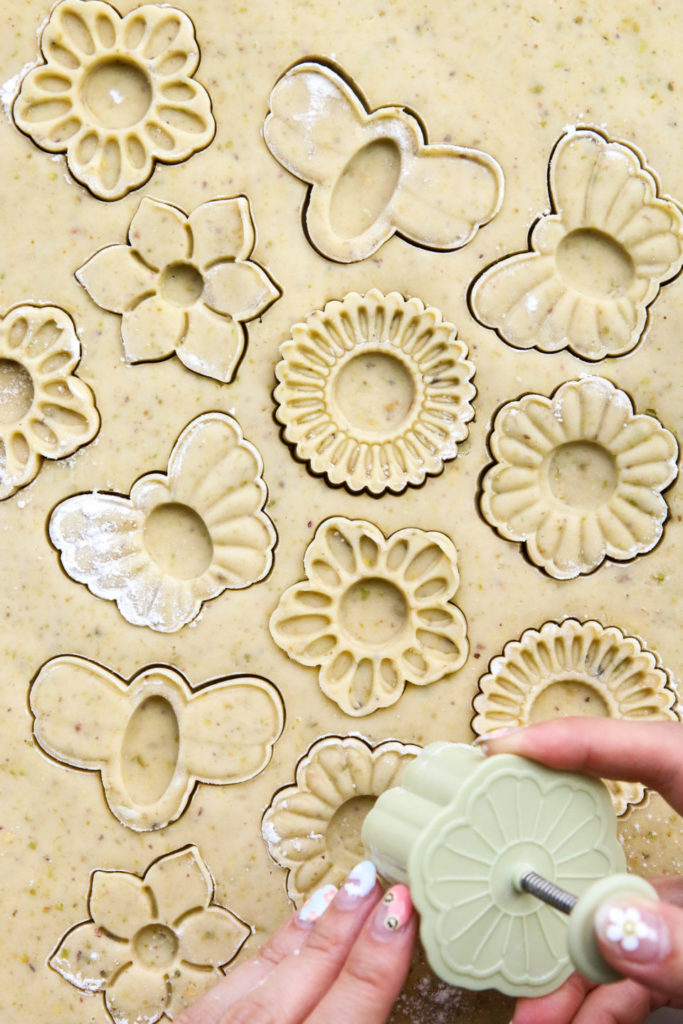
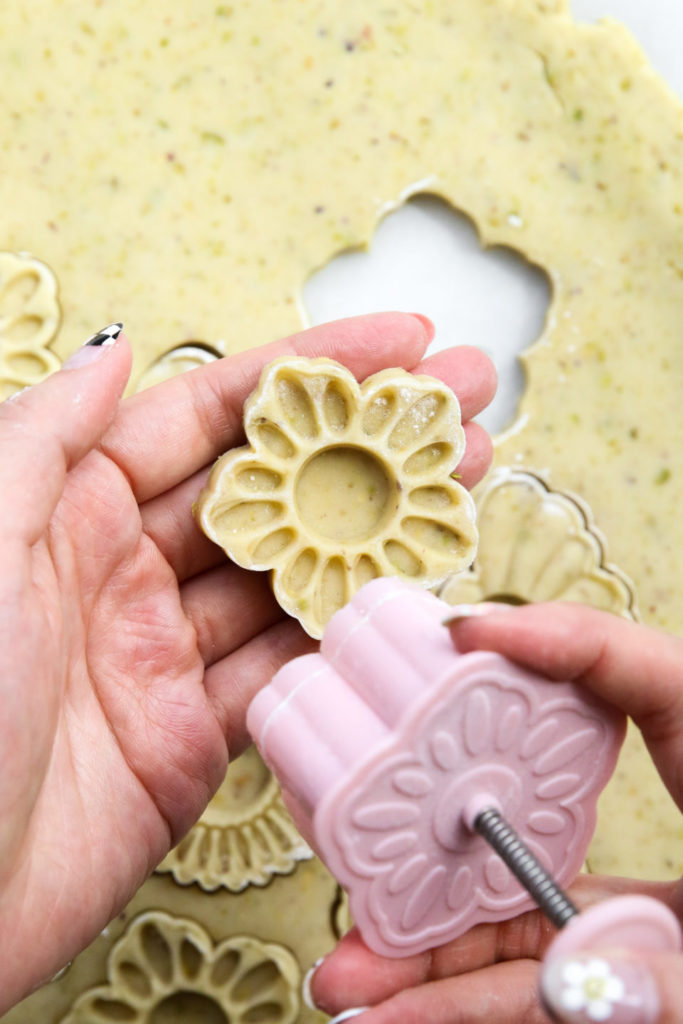
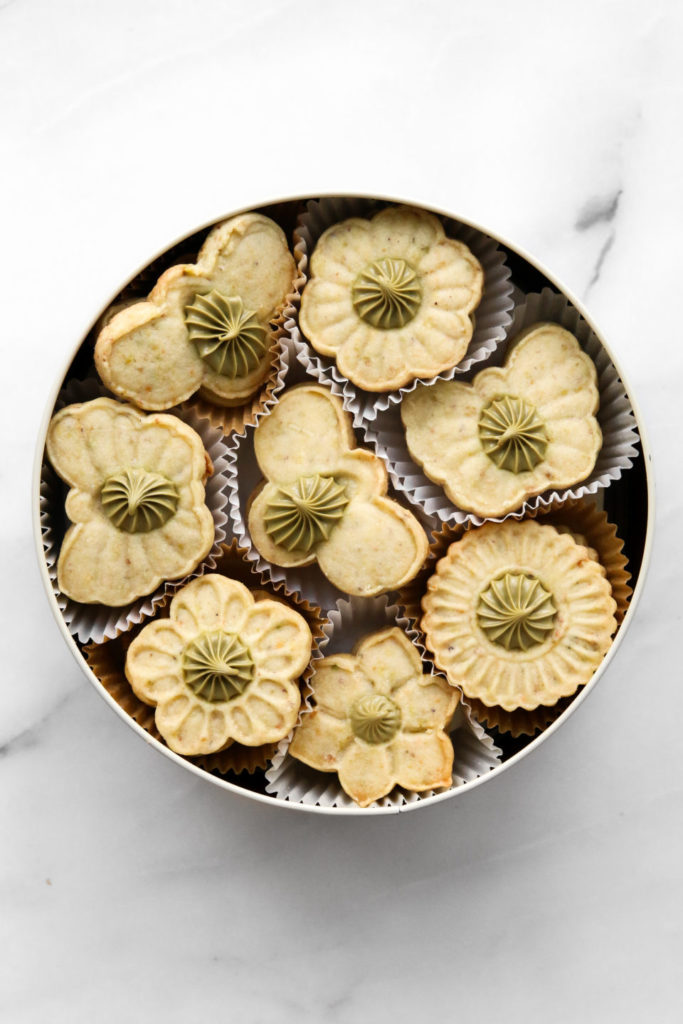
My weakness? Cookie stamps. I’m not talking about normal circle cookie and heart-shaped cutters (though there’s always a time and place for those), but the ones with intricate designs and a little spring-loaded plunger that creates the most beautiful cookies. You make your dough and roll it out the same way you would when you use a cookie cutter, but instead of cutting out just the shape, the cookie stamp will cut out the shape and leave an impression of a design. I firmly believe that cookies made with cookie stamps taste better and there’s no way anyone can change my mind about that.
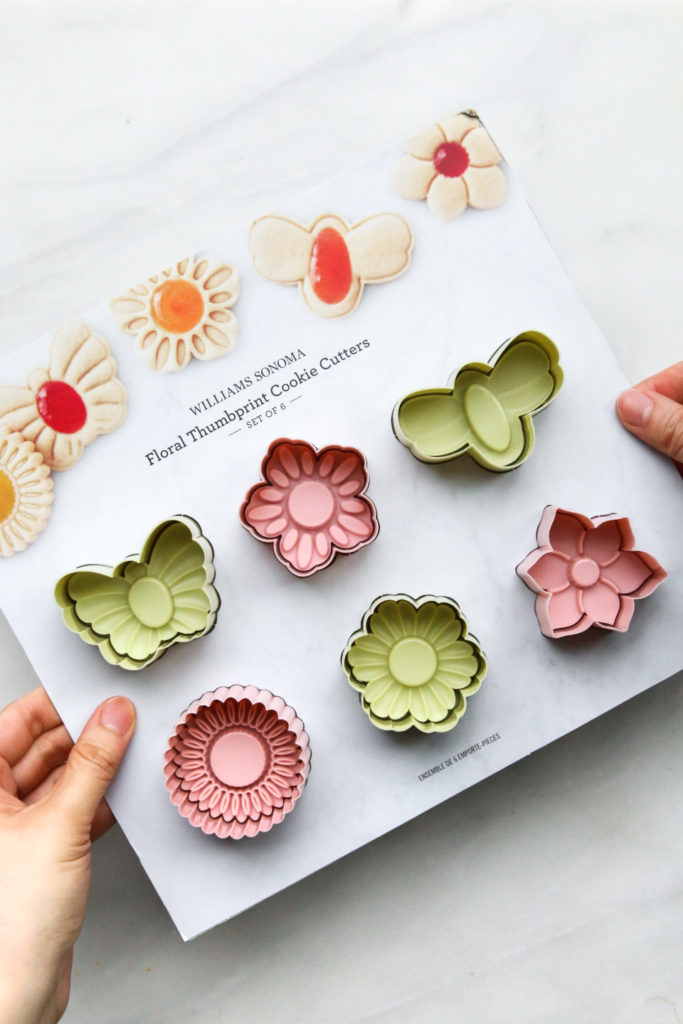
There are several types of cookie stamps but there are two main varieties: ones that leave a pattern or design on the cookie and ones that create a deeper impression or well in the centre of the cookie that is meant to be filled with a jam or ganache once the cookie is baked. I love both equally but today we’re making cookies with the latter. This isn’t my first set of thumbprint cookie stamps. I got the original Williams Sonoma stamp set a few years back and even used them for a recipe in my cookbook — mocha cookies filled with lavender caramel. I’ve also made my own version of the classic ‘fruit creme’ cookies that I grew up eating. Every time I use this set of cookie stamps, I get questions asking where they are from and tips and tricks for making sure the design stays when the cookie is baking. So today I’m sharing a new recipe that’s perfect for stamping along with some tips and showing off this brand-new set of Spring Floral Thumbprint Cookie Stamps I got from Williams Sonoma Canada.
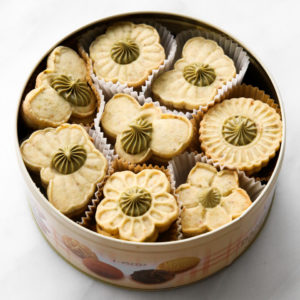
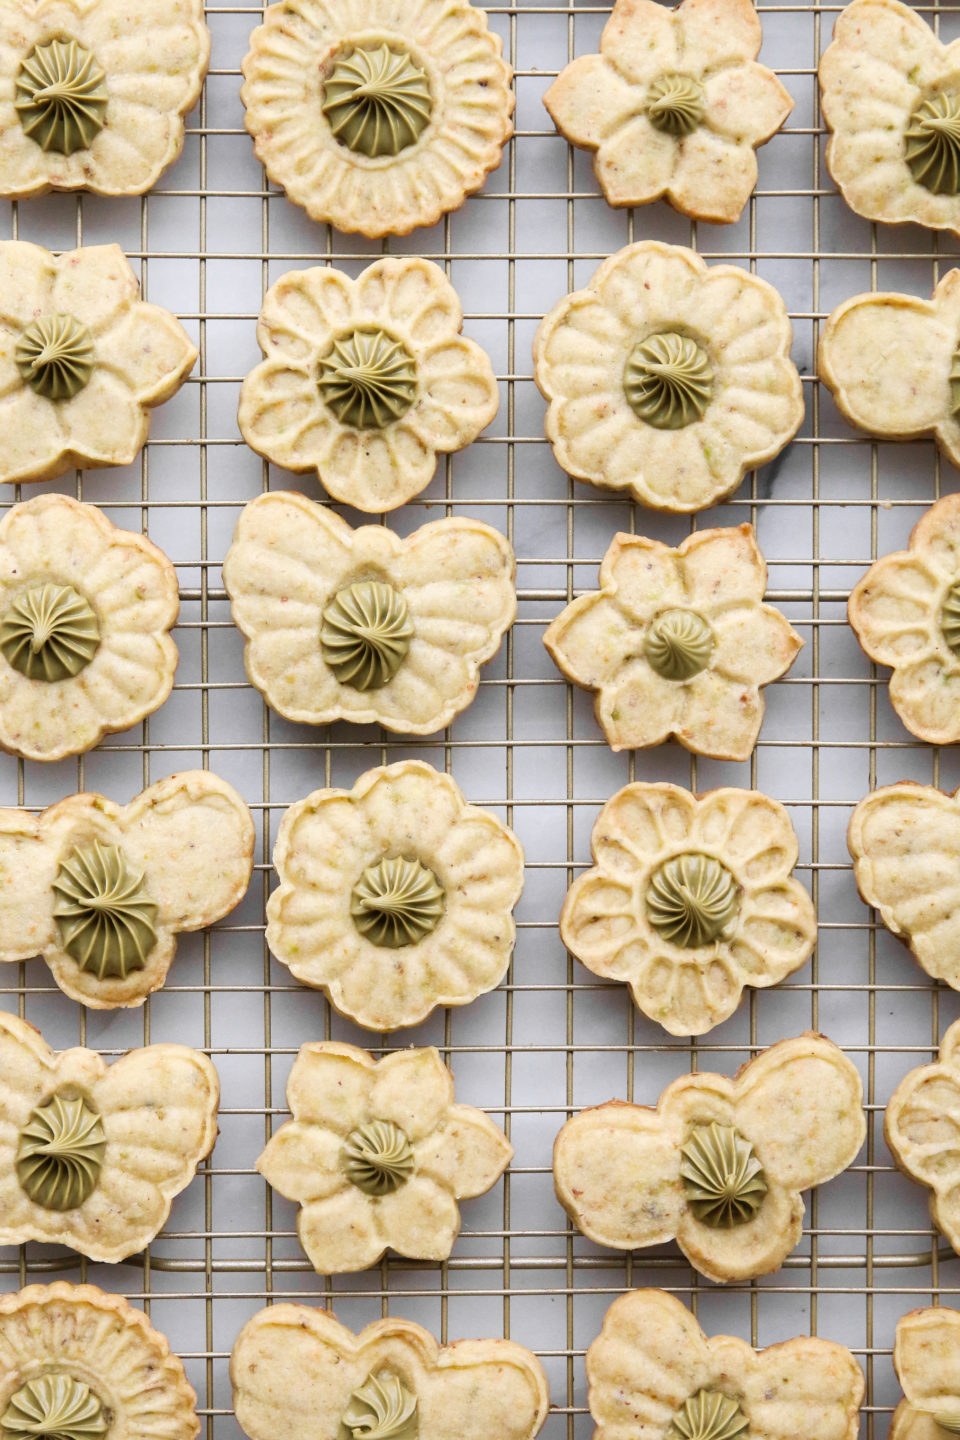
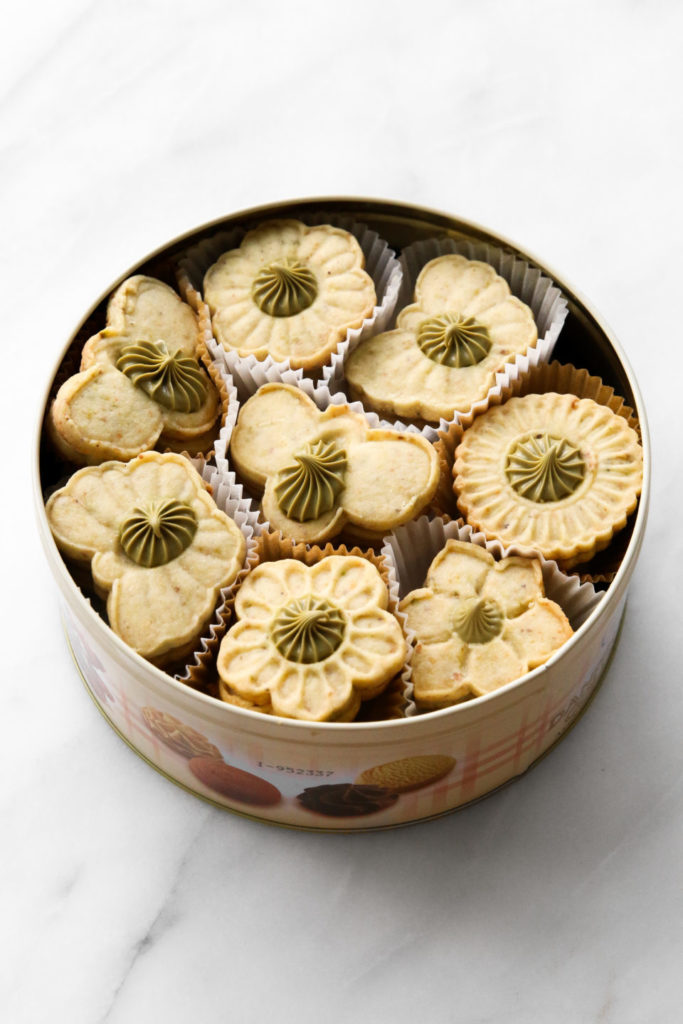
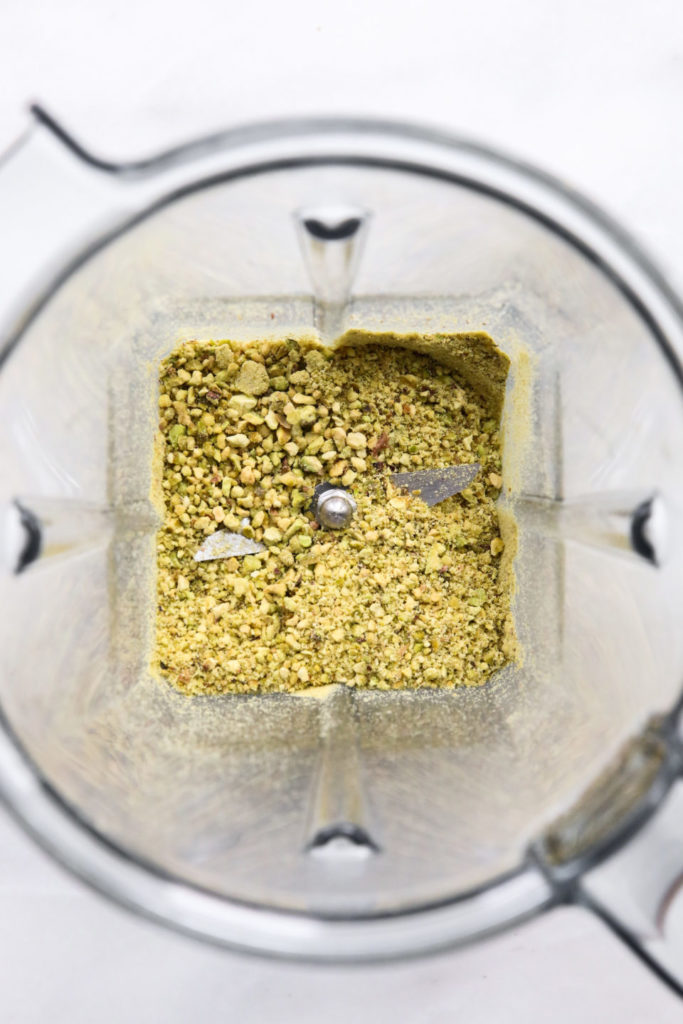
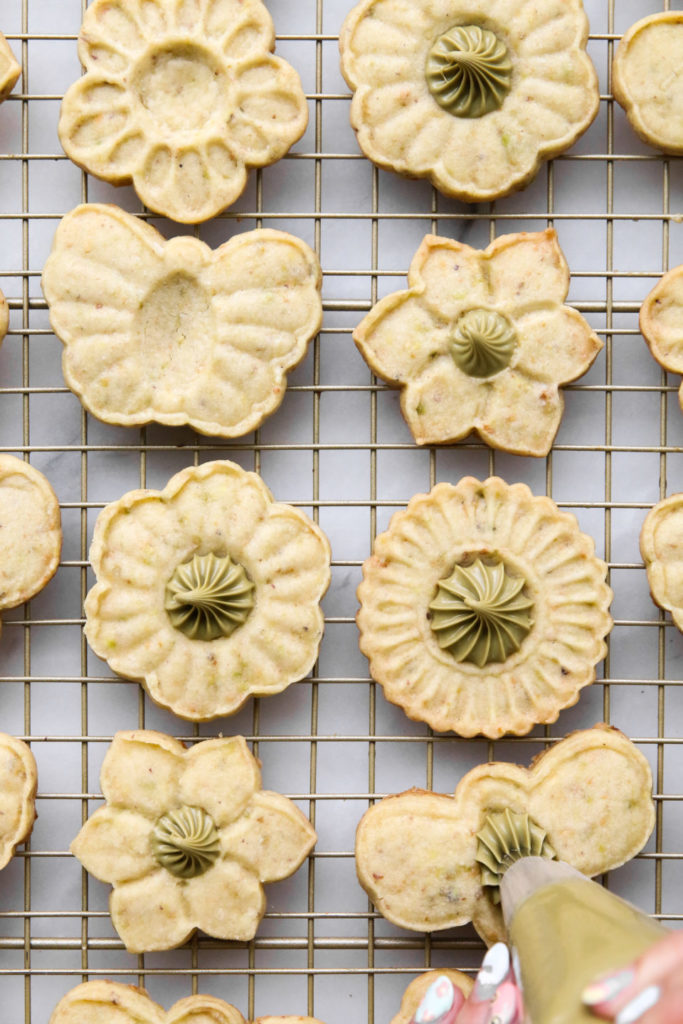
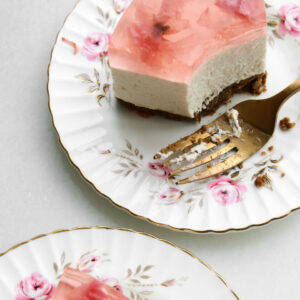
I love pistachio in baked goods because of both the flavour and colour it adds to cookies and cakes. I mostly commonly add pistachios into cookies, whether it’s incorporating roughly chopped nuts into a cookie dough or using finely ground pistachios with the other dry ingredients. These pistachio shortbread thumbprints use a mixture of flour and ground pistachio flour/meal and once baked, is filled with a pistachio white chocolate ganache. You can also fill the cookies with other fillings you like — pistachio cream, jams, nut butters, lemon curd, whatever makes you happy.
Steps to making successful stamped thumbprint cookies:
- Make sure you’re using a cookie recipe that’s meant for stamped/roll out cookies like shortbread or sugar cookies. This will ensure that the cookies will retain their shape and won’t spread in the oven.
- Flour your cookie stamps before using. There is nothing more frustrating than trying to get cookie dough out from the crevices of a cookie stamp. Flour your cookie stamps before using them to make sure your cookie cut outs come out cleanly and easily.
- Chill cookie cut outs before baking. I ALWAYS freeze my cookie cut outs before baking to make sure they don’t spread as much in the oven. After you’ve stamped and cut out all the cookies, place them on the baking sheet and allow them to chill in the freezer for 5 – 10 minutes until firm. Once the oven has preheated and the cut outs are frozen, the cookies are ready to be baked.
- Shape cookies if necessary. Once the cookies are golden brown and have come out of the oven, don’t hesitate to do any reshaping you think is necessary. I like to use a ¼ teaspoon and gently press on the indents of the thumbprint cookies to help make the well deeper so it can hold more filling.
- Fill cookies after they have cooled. It is important to allow the cookies to completely cool before filling them. Filling a hot cookie will cause the filling to melt and it might seep into the cookie, making a soggy cookie. Transfer the baked cookies to a wire rack to help speed up the cooling process.
Thank you Williams Sonoma Canada for supporting this blog!


Pistachio Shortbread Thumbprint Cookies
Ingredients
- 60 g (5 tbsp) roasted unsalted pistachios
- 240 g (2 cups) all-purpose flour
- 3/4 tsp salt
- 227 g (1 cup) unsalted butter, room temperature
- 120 g (1 cup) powdered sugar
- 3/4 cup filling of choice, (jam, nut butter, pistachio cream, etc.)
Instructions
- Preheat oven to 350F. Line a baking sheet with parchment paper and set aside.
- Add pistachios to food processor or blender and blitz until it becomes a fine meal. Some larger pieces are okay. Alternatively, you can chop up the nuts finely by hand.
- In a small bowl, whisk together ground pistachios, flour, and salt. Set aside.
- In a bowl of a stand mixer fitted with a paddle attachment, cream together butter and powdered sugar on medium-high speed until smooth.
- Add the dry ingredients and mix on low and gradually increase to medium speed. Mix until no streaks of flour remain, about 1 minute.
- Cut a large piece of parchment paper. Transfer dough to parchment and take a second sheet of parchment paper the same size and roll out dough with a rolling pin. This will prevent the need to add extra flour to roll out the dough. If the dough is soft as this point, transfer it to the freezer to firm up for about 10 minutes. Roll out dough to ¼-inch in thickness.
- Using cookie stamps, stamp out cookies and transfer to prepared baking sheet. Repeat until all the dough is used up. Transfer the tray of cookies to the freezer once to allow the cookies to firm up, about 5 – 10 minutes. This will prevent the cookies from spreading too much.
- Once oven has preheated, transfer the tray of cookies to the oven to bake for 12 – 14 minutes, until the edges are golden.
- Allow cookies to cool on baking sheet for 10 minutes before transferring to cooling rack to cool completely.
- Once cookies have cooled, fill cookies with filling of choice.


Helen says
Супер, хочу также научиться, можно мне рецепты на русском🙏? Буду печи отмечать вас
Patti says
Recipe for the pistachio ganache? Pretty please?