


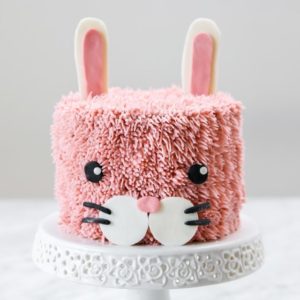
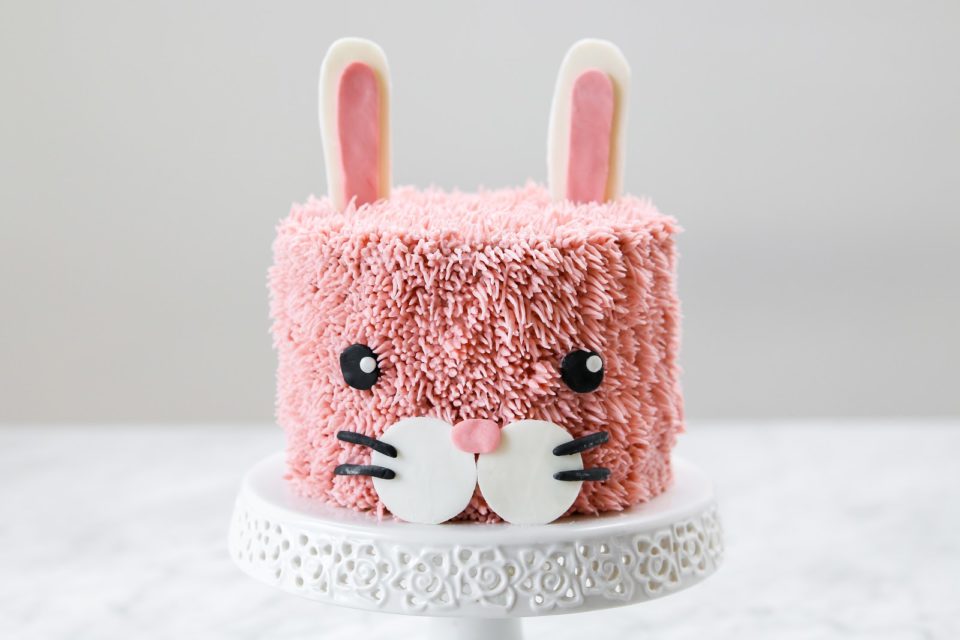
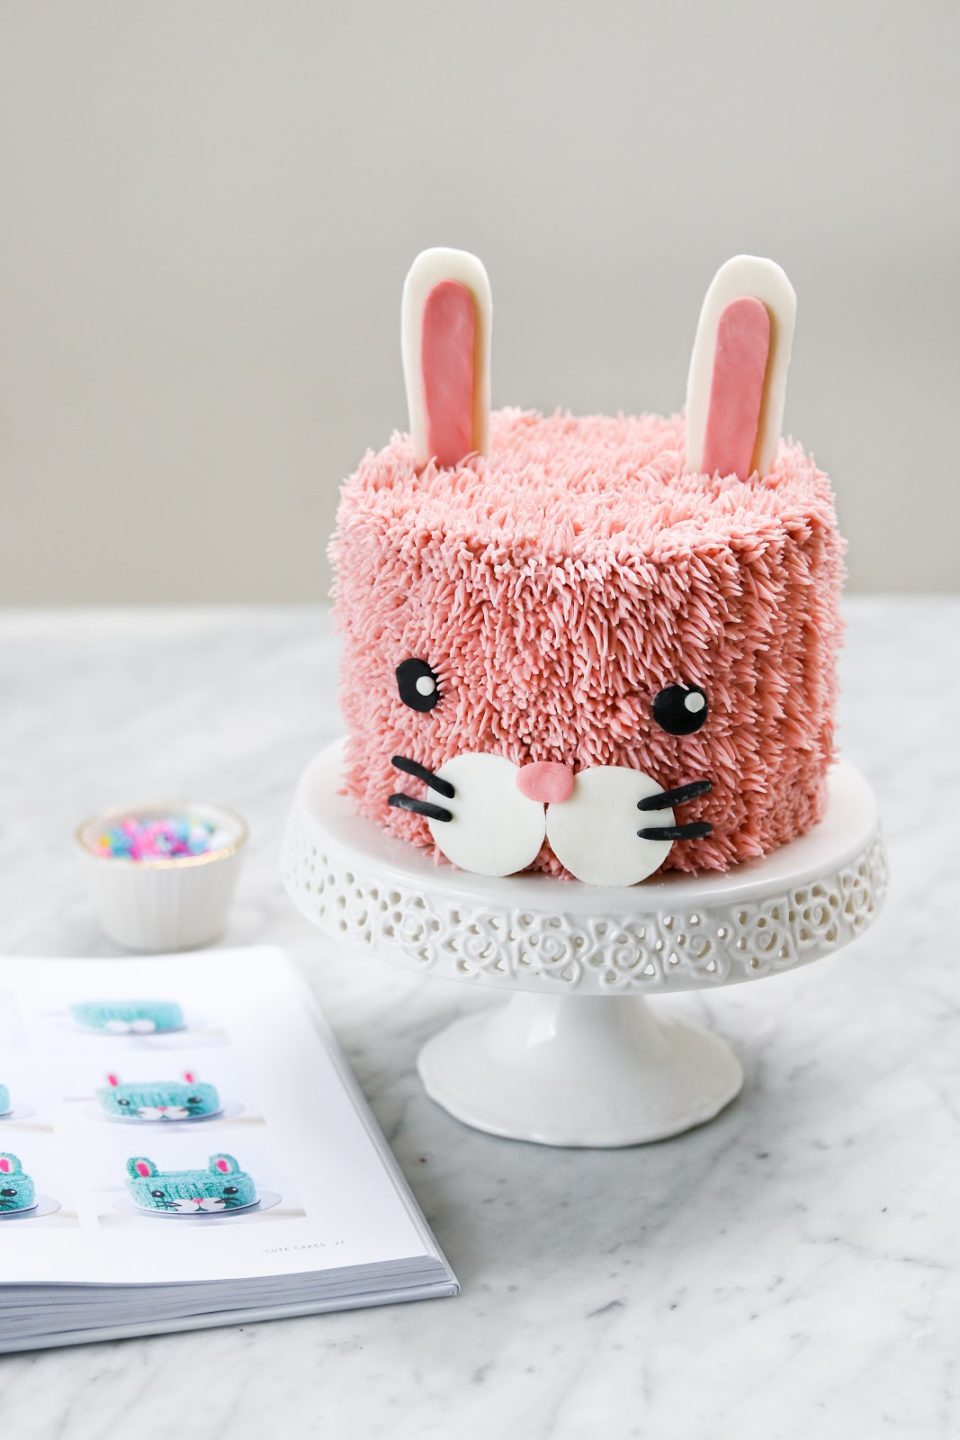
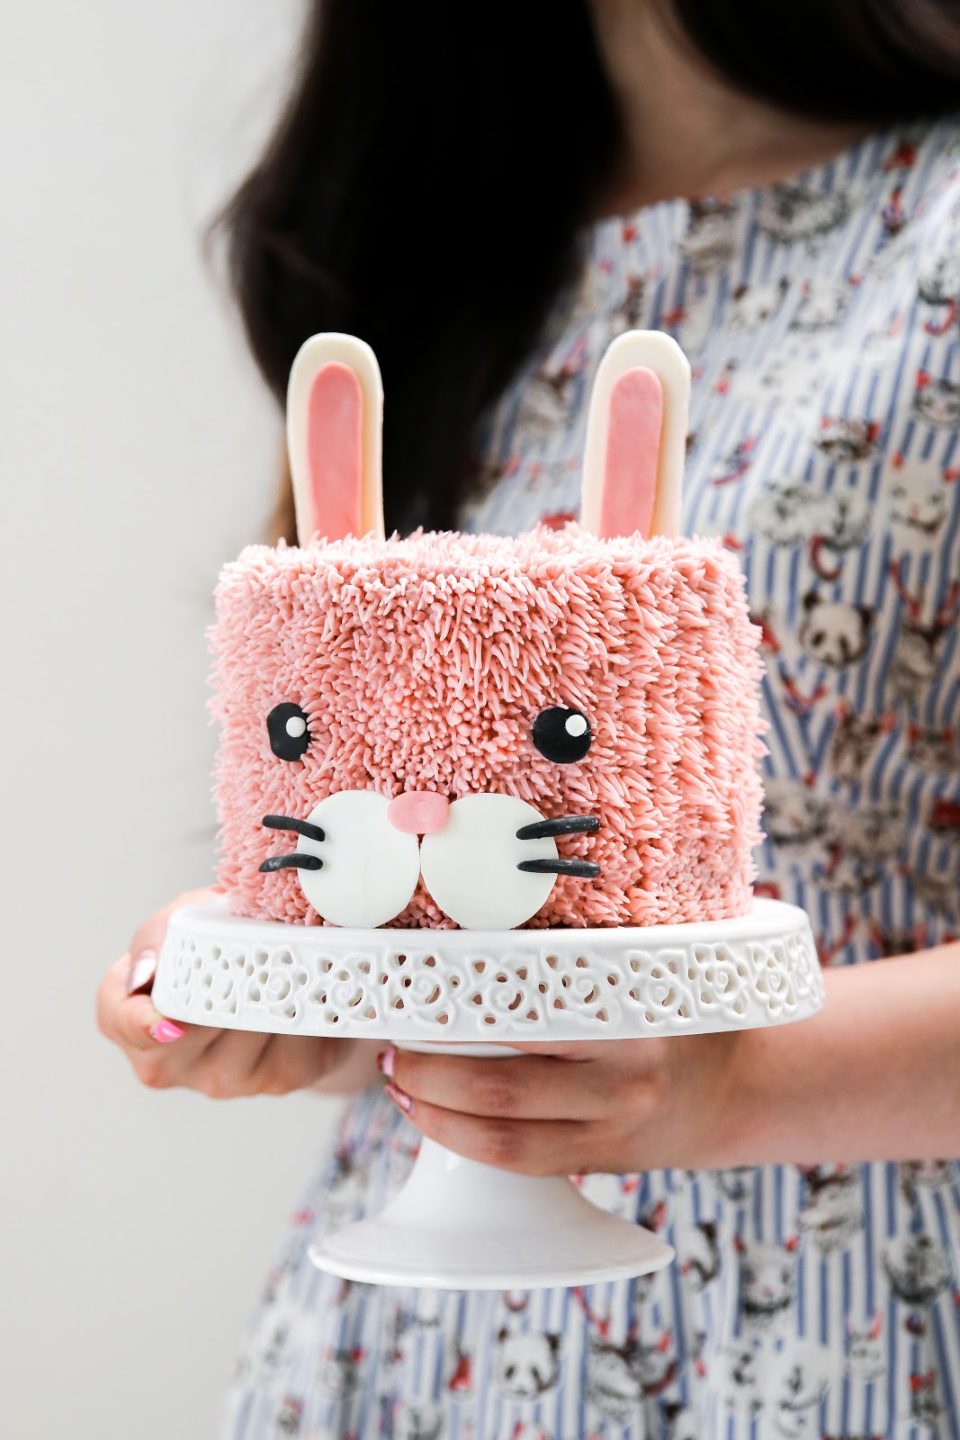
I baked, decorated, and photographed this cake on Sunday and I am already talking about it here on Tuesday. I never have this quick of a turnaround time because I get excited to take photograph cakes but writing it up is another story. This time is a bit different because the cake I made on Sunday is a Coco Cake Land cake and it is from her new book, Coco Cake Land: Cute and Pretty Party Cakes to Bake and Decorate. Even if you don’t recognize the name Coco Cake Land (but I’m sure you do), you will recognize the cute furry animal cakes (is it weird to call a cake ‘furry’?) she makes. Without even looking at the source of the photo, I can easily point out a Coco Cake Land cake. Her style is always so cute and whimsical.
Lyndsay’s blog was one of the first blogs I followed when I started doing the whole baking and blogging thing. Since the first day I saw Lyndsay’s blog and Instagram, I have been obsessed. Lyndsay is not only a cute cake maker, but she is also a breast cancer survivor (!!) and a maker of super cool feminist cakes. She is an overall super cool person that I can’t wait to meet her irl. We are meeting up for hot chicken sandwiches soon!
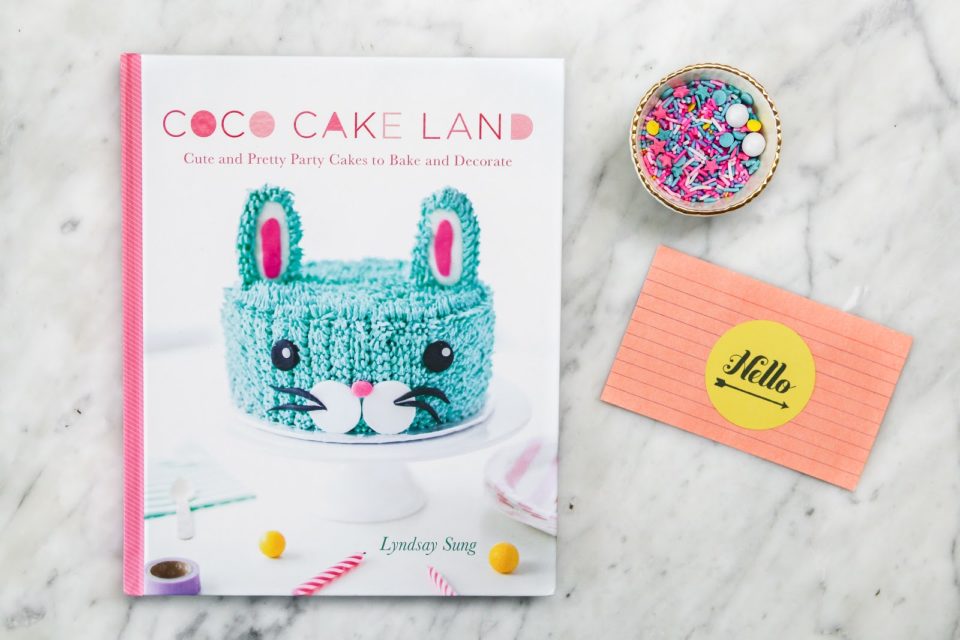
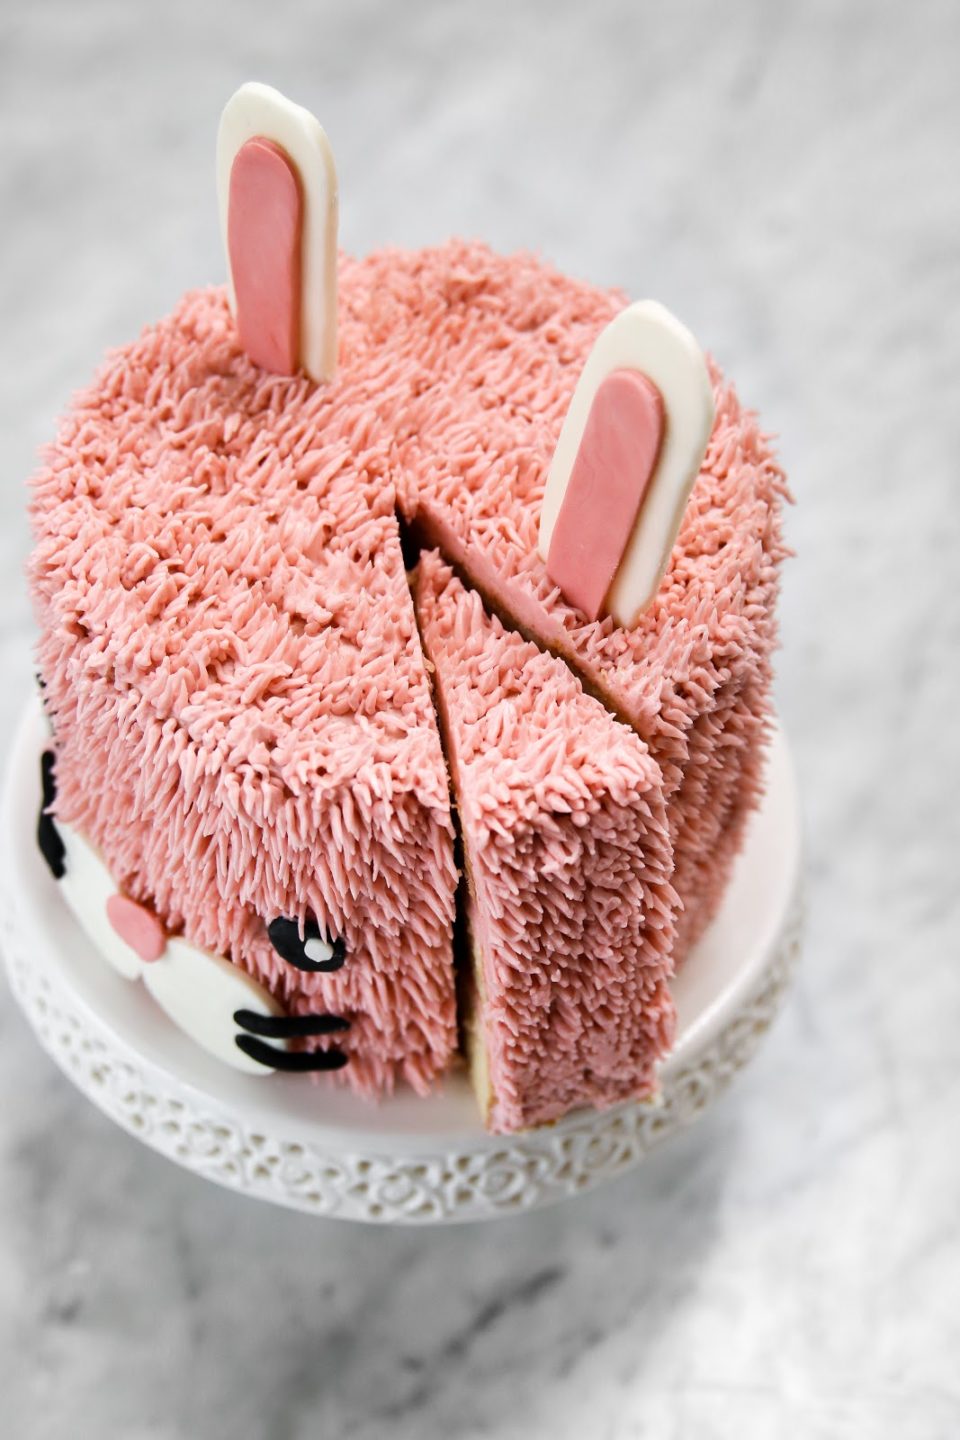
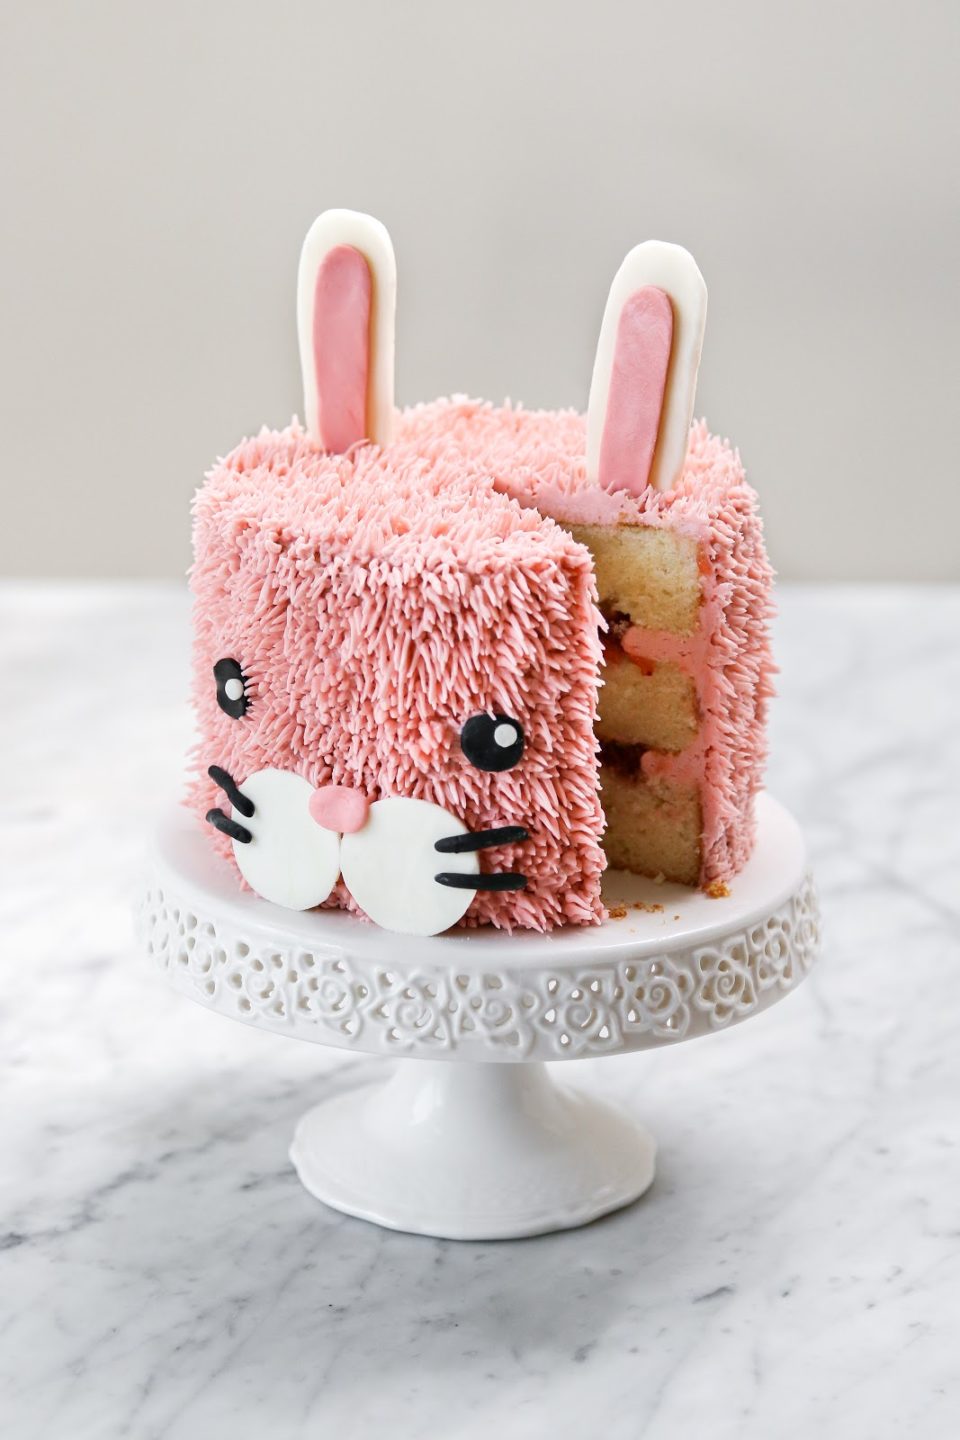
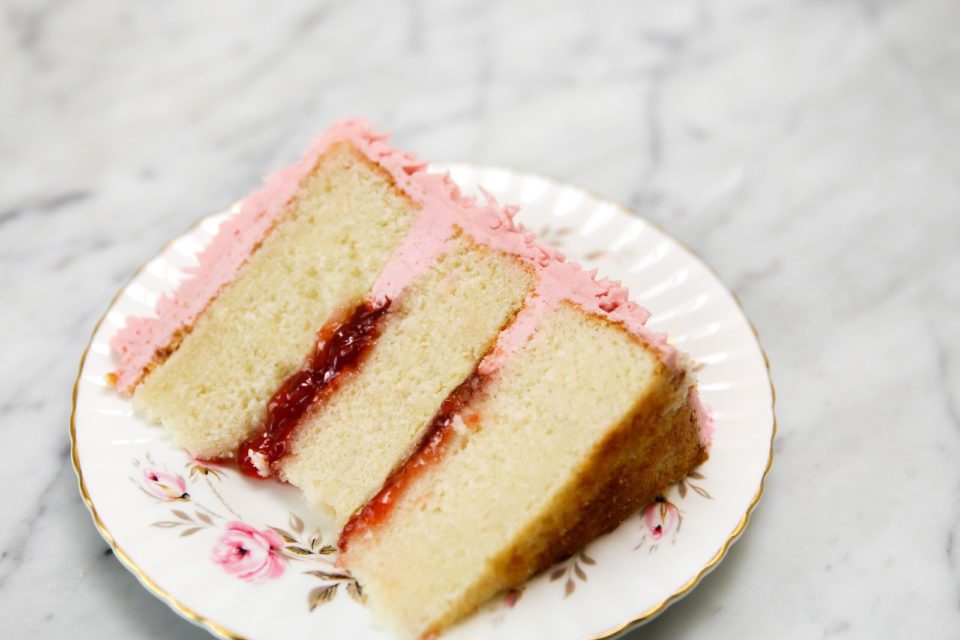
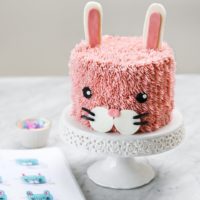
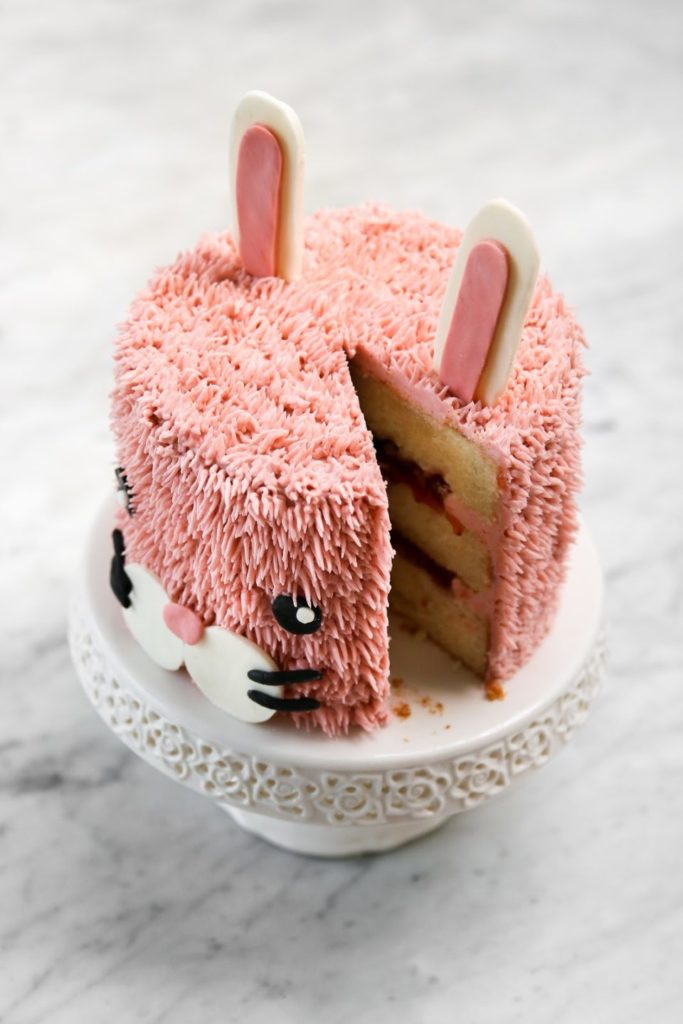
Lyndsay’s new book arrived in my mailbox last week. The book is split into two categories, cute cakes and pretty cakes, and I wanted to make them all. After having a quarter life crisis about which cake to make, I finally decided on the cover cake. I have never piped fur or used fondant before but Lyndsay’s step-by-step photo guide was extremely helpful. Everything went smoothly and after piping rows and rows of pink buttercream fur, the cover bunny cake came to life. I felt a tad bad cutting into the bunny’s cute face but I knew I needed to eat a few slices of Lyndsay’s vanilla cream cake (might as well call it vanilla dream cake because it was that good) recipe. Congratulations on your new book, Lyndsay! I cannot wait to bake all the things.
Coco Cake Land: Cute and Pretty Party Cakes to Bake and Decorate comes out today (August 14)!
Equipment
- For cake decoration: White fondant, Black fondant, Pink fondant
- Multi-opening piping tip (I used Wilton #233, Lyndsay uses #234)
- Piping bag
- Skewers
- Cake turntable (optional)
Ingredients
Vanilla Cream Cake
- 3/4 cup unsalted butter
- 1 1/3 cup granulated sugar
- 3 large eggs
- 1 1/2 tsp vanilla
- 2 1/4 cups cake flour
- 3/4 tablespoon baking powder
- 1/3 teaspoon salt
- 3/4 cup heavy cream
- 3/4 cup whole milk
Vanilla American Buttercream
- 1 1/2 cups unsalted butter, room temperature
- 3 cups confectioners’ sugar, sifted
- 2 teaspoon pure vanilla extract
- 1 teaspoon whole milk
- 2 -3 drops of gel food colouring, if using
Instructions
Vanilla Cream Cake
- Preheat the oven to 350F. Prepare three 6-inch round cake pans.
- In the bowl of a stand mixer fitted with the paddle attachment, beat the butter and sugar on high speed until light and fluffy, scraping down the sides of the bowl with a spatula as needed.
- Turn the mixer down to low speed and add the eggs one at a time until incorporated, then add the vanilla extract.
- In a large bowl, use a balloon whisk to mix together the flour, baking powder, and salt.
- In a large liquid measuring cup, combine the cream and the milk.
- With the mixer on low speed, add one-third of the flour mixture, then half of the milk mixture. Keep alternating as you add the mixtures, finishing with the dry ingredients. Careful not to overmix batter.
- Divide the batter evenly among the prepared cake pans and smooth the tops with an offset spatula.
- Bake for 25 to 27 minutes, checking for doneness at 20 minutes.
- The cakes will be done when a toothpick inserted in the centres comes out clean and the tops of the cakes are light golden brown.
- Cool cakes for 30 minutes in their pans and then gently turn them out onto a wire rack to finish cooling completely. Cakes should be completely cooled before frosting.
Vanilla American Buttercream
- In the bowl of a stand mixer with a paddle attachment, beat the butter on high speed until it is light and fluffy, about 2 minutes.
- Scrape down the sides of the bowl with a spatula. Add the sifted confectioners’ sugar, vanilla extract, and milk. Mix on low speed to combine the ingredients.
- Add gel food colouring if using. Mix on low to distribute colour evenly.
- Once the sugar is incorporated, crank the mixer to high speed and beat the mixture for another 2 minutes, until it has more than doubled in volume.
- Transfer buttercream into a piping bag fitted with multi-opening piping tip.
- After layering cake and applying a crumb coat, start piping fur all around the cake by holding the piping bag at a 90-degree angle to the cake’s surface and squeeze in short spurts until entire cake is covered.
Cheeks:
- – Roll out the white fondant and cut out two white circles for the cheeks.
- – Using black fondant, roll out four short whiskers.
Eyes:
- – Cut out two black fondant small circles for the eyes. I used the back of a piping tip for this.
- – Cut out two smaller circles of white fondant for inside of the eyes.
Nose:
- – Cut out a small oval of pink fondant.
Ears:
- – Cut out two white fondant ovals for the ears. Cut out a similar shape, but smaller, of pink fondant for the inner ear. Push a thin skewer down the ear so you can attach it up right to the cake.
- Place the pieces on top of the cake and press lightly to adhere to the frosting.
Notes
“Life is short. Enjoy the good times, treasure your loved ones, and don’t forget to eat cake.”
– Coco Cake Land

Coco Cake Land says
Wheeeeeeeee I couldn’t love this more sweet friend!!!!! You rocked this bunny so hard! Love the photos too! Can’t wait for fried chicken lol!!! Thanks so much Amy! Xo
Unknown says
Please continue this great work and I look forward to more of your awesome blog posts. Satta king
suajata says
Thank you for this great list of Blog Commenting Sites. This will surely help us to rank our blog high and increase our blog traffic.
Aashvi Khanna says
Wow Yummy
Order food online says
Order tasty takeaway dishes and restaurants in Carlisle. Choose from a range of kitchens that are delivered right to your front door!
Kashmir Packages says
Love your website. Keep up the good work.
KashmirHills says
Thanks for sharing this informative post with us. Keep posting like this.
KURWA_BOBER says
Regis High School
Acompañantes San Martin says
Ella te llevará a los territorios desconocidos de la naturaleza sexual para permitirte obtener una euforia, una excitación y un placer erótico inolvidables como nunca antes.